Meals on a Loveseat

Meals on a Loveseat
最新食譜「美味在一起」現已於各大書店及amazon.com有售 "Meals on a Loveseat" is on sale at HK bookstores and at amazon.com now

Pages

Showing posts with label Tomato. Show all posts

Saturday, November 21, 2015

COOK - 自創沖縄苦瓜沙律 Okinawa Bitter Gourd Salad

我知,我知,很多人不吃苦瓜因為它苦,甚至有個朋友不吃苦瓜的原因是因為不喜歡它的名字,真是無辜的苦瓜喔。
我本來沒有特別喜歡吃苦瓜,可是自吃過沖繩的特產品種後,變便得愛吃了。沖繩的呈深綠色,表面的粒粒很細小,味不太濃,清爽帶微微甘苦,生吃也可以。
在超市看到有賣,立刻買下來,但又不想這麼沉悶老是吃沖繩苦瓜豆腐炒蛋,便自創起這個沙律來,入口立刻能帶給你清爽飽足但又很健康的感覺(減肥中人仕自我感覺良好中),況且又能排毒美顏,吃得苦中苦。。。。。嘛!


自創沖縄苦瓜沙律 (沖縄ゴーヤサラダ)

沖縄苦瓜 1條 (切半,去耔,切薄片)
水浸吞拿魚 1罐 (80g,隔去水份) 
1/4 紅洋蔥 (切極薄片)
1條醋醃小黃瓜 (切碎)
4粒車喱茄 (切半)
海鹽
鮮磨黑胡椒
鰹魚碎


1. 將鹽灑在苦瓜片上並拌勻,靜置10分鐘。(此舉可帶走苦味)
2. 在一小碗內,放入鹽水浸泡紅洋蔥片直至變半透明,隔水備用。
3. 在一小鍋內煲滾水,加入苦瓜煮至浮起並呈翠綠色,約5分鐘。立刻隔水放入一盤冰水內降溫,隔水備用。


4. 最後將所有材料混合在一起,以海鹽和黑胡椒調味,加上鰹魚碎作裝飾及提味便成。這樣便能品嘗到清新爽脆又不苦的苦瓜了!


Bitter Gourd Tuna Salad

1 Bitter Gourd (halved, deseeded and thinly sliced)
1 Can Tuna (80g, drained)
¼ Red Onion (thinly sliced)
1 Gherkin (finely diced)
4 Cherry Tomatoes (halved)
Salt
Ground Pepper
Bonito Flakes

1. Massage the sliced bitter gourd with salt and let sit for 10 minutes.
2. In a small bowl, melt salt with water and add red onion to soak until become translucent. Drain.
3. In a pot of boiling water, add bitter gourds and cook until they flow, about 5 minutes. Immediately drain and soak in ice water. Drain after cool down.

4. In a serving bowl, mix bitter gourd, tuna, red onion, gherkin and cherry tomatoes. Season with salt and pepper and garnish with bonito flakes to serve.


Saturday, July 4, 2015

COOK - 西班牙風乾腸炒四色鮮蔬菜粒 4-colored Veggies with Chorizo and Eggs

Weekend brunch 最鐘意食多菜少肉,除了一般蛋類菜式,可試用新鮮瓜菜炒粒粒,不同顏色蔬菜有不同營養成份,多些顏色更健康。

西班牙風乾腸獨有的煙燻香味配爽口鮮蔬菜,再打兩隻雞蛋在熱辣辣的煎鍋上,食的時候混合一下,立刻變滑滑蛋,好味!如有Tortilla的話,把料夾在中間吃,飽肚又美味!


西班牙風乾腸炒四色鮮蔬菜粒 (2人份)

橄欖油  少許
西班牙風乾腸 1/3條 (切粒)
茄子  半條 (切粒)
意大利青瓜  半條 (切粒)
翠玉瓜  半條 (切粒) 
蕃茄  1個 (切粒)
紅椒  1/2個 (切粒)
百里香 3-4支 (取葉)
雞蛋 2隻
鹽  適量 (不必太多,西班牙風乾腸已有鹹味)
鮮磨黑胡椒  適量
紅椒粉  少許
* 我是用我雪櫃內有的剩菜,本來想買黃色的意大利青瓜取代這裡的翠玉瓜,可是買不到。所以繼續說我的煮食格言,不必拘泥於已知的做法,發揮創意才會有意外驚喜。


1. 煎鍋(我用26 skillet)內加一點橄欖油,先將西班牙風乾腸炒香至油份釋出,放入其他蔬菜同炒。加入百里香,鹽,鮮磨黑胡椒和紅椒粉炒至蔬菜熟透。(不必加水,蔬菜內有水份,吃時才原汁原味)

2. 蔬菜炒熟,鑊仍然熱燙的時候打入2隻雞蛋,不要攪動,讓它在熱鍋內燒約2分鐘,離火,原鍋上桌拌勻,唔客氣喇!


4-colored Veggies with Chorizo and Eggs (Serves 2)

A little Olive Oil
1/3 Chorizo (diced)
1/2 Eggplant (diced)
1/2 Zucchini (diced)
1/2 Chinese Zucchini (diced) 
1 Tomato (diced)
1/2 Bell Pepper(diced)
3-4 sprigs of Thyme (leaves)
2 Eggs
Salt (As Chorizo is seasoned, a little is enough)
Black Pepper
Paprika
* I made this dish by using whatever vegetables are left in my fridge. I wanted to use squash instead of Chinese zucchini but couldn't find it in the supermarket. So, as I have always said, cooking has no limits, sometimes creativity will surprise you.

1. Heat olive oil in skillet(mine is 26cm), pan fry the chorizo until aromatic, add all the diced vegetables. Season with thyme, salt, pepper and paprika, fry until the vegetables are cooked, around 8 minutes. (Many like to add water when cooking vegetables, I tell you what, it's not needed, these vegetables have moist in them, please do not dilute the nice juicy freshness).  
2. When the vegetables are cooked, crack 2 eggs and leave them in the heated pan for 2 minutes. Serve directly on skillet and scramble the eggs, they become nice and smooth to go with the smoky chorizo and crunchy veggies. You can also serve this dish with tortilla, it's nice to share! 


Monday, June 29, 2015

COOK - 墨西哥小辣椒蜜糖鷄翼 Mexican Honey Garlic Chicken Wings with Jalapeño

有一家墨西哥餐廳我是十分喜歡去的,其中的雞翼是我必點菜式,因為好食到每次都要爭食!

可能是因為我在加拿大長大,墨西哥菜在那邊相當流行。但香港真的不算多,好吃的更少。ご主人本來就不喜歡吃那些皮包著什麼的菜,所以對Taco, Burrito, Quesadilla那些東西完全沒興趣,唯獨是這個雞翼必定會搶著吃!

可是那個雞翼其實是炸的。我很怕開油鑊,一來麻煩,二來油不能完全翻用太多次,在家炸東西實在不太cost efficient. 但買了Airfryer後,感覺做雞的菜式很理想,效果也很好,所以今次又憑著味覺記憶把那個墨西哥雞翼自己做一次出來,真的是超好味,ご主人說比那餐廳的更好味。既然是這樣,我也不得不花時間寫食譜跟大家一齊分享一下!


墨西哥小辣椒蜜糖鷄翼 (12隻 ~ 2人份)

鷄翼 12隻
海鹽  適量
紅椒粉(Paprika) 適量 (optional**)
橄欖油 2湯匙
生粉  適量
墨西哥小辣椒(Pickled Jalapeño) 10片 (optional**)
蒜頭  4-5瓣 (切碎)
麥芽糖  6湯匙 (其實很難量度的,就用筷子卷起1/3 盒左右)
辣椒油  1茶匙 (optional**)
芫荽 1支(只用葉,切碎)

1. 將雞翼用鹽,紅椒粉及橄欖油醃好,放入雪櫃醃2小時。
2. AF預熱190ºC 5分鐘,grill盤搽油。
3. 將雞翼表面撲上生粉,放入grill pan 內。190ºC 7分鐘
4. 打開AF, 放入墨西哥小辣椒同烤。190ºC 5分鐘
5. 此時用平底鍋加橄欖油燒熱,放入蒜茸爆炒至金黃脆粒,加入辣椒油和麥芽糖煮熱。當麥芽糖溶化時,將AF內的雞翼及墨西哥小辣椒倒入,拌勻令汁包顆著雞翼表面。
6. 上碟,灑上芫荽,趁熱食喇!Amigo!!
**不吃辣的可將材料內Optional的項目拿走便可


Mexican Honey Garlic Chicken Wings with Jalapeño (Serves 2, 12 pcs)

12 Chicken Wings/Drummets
Sea Salt
Paprika (optional)
2 tbsp Olive Oil 
Corn Starch
10 slices Pickled Jalapeño (optional)
4-5 cloves Garlic (finely chopped)
6tbsp Maltose (It's very sticky and becomes very hard to measure, just roll 1/3 of a box with a chopstick)
1tsp Chili Oil (optional)
Coriander (leaves only, chopped)

1. Marinate the wings with salt, paprika and olive oil, cover and place in the fridge for 2 hours. 
2. Preheat Airfryer to 190ºC 5 mins, oil the grill pan。
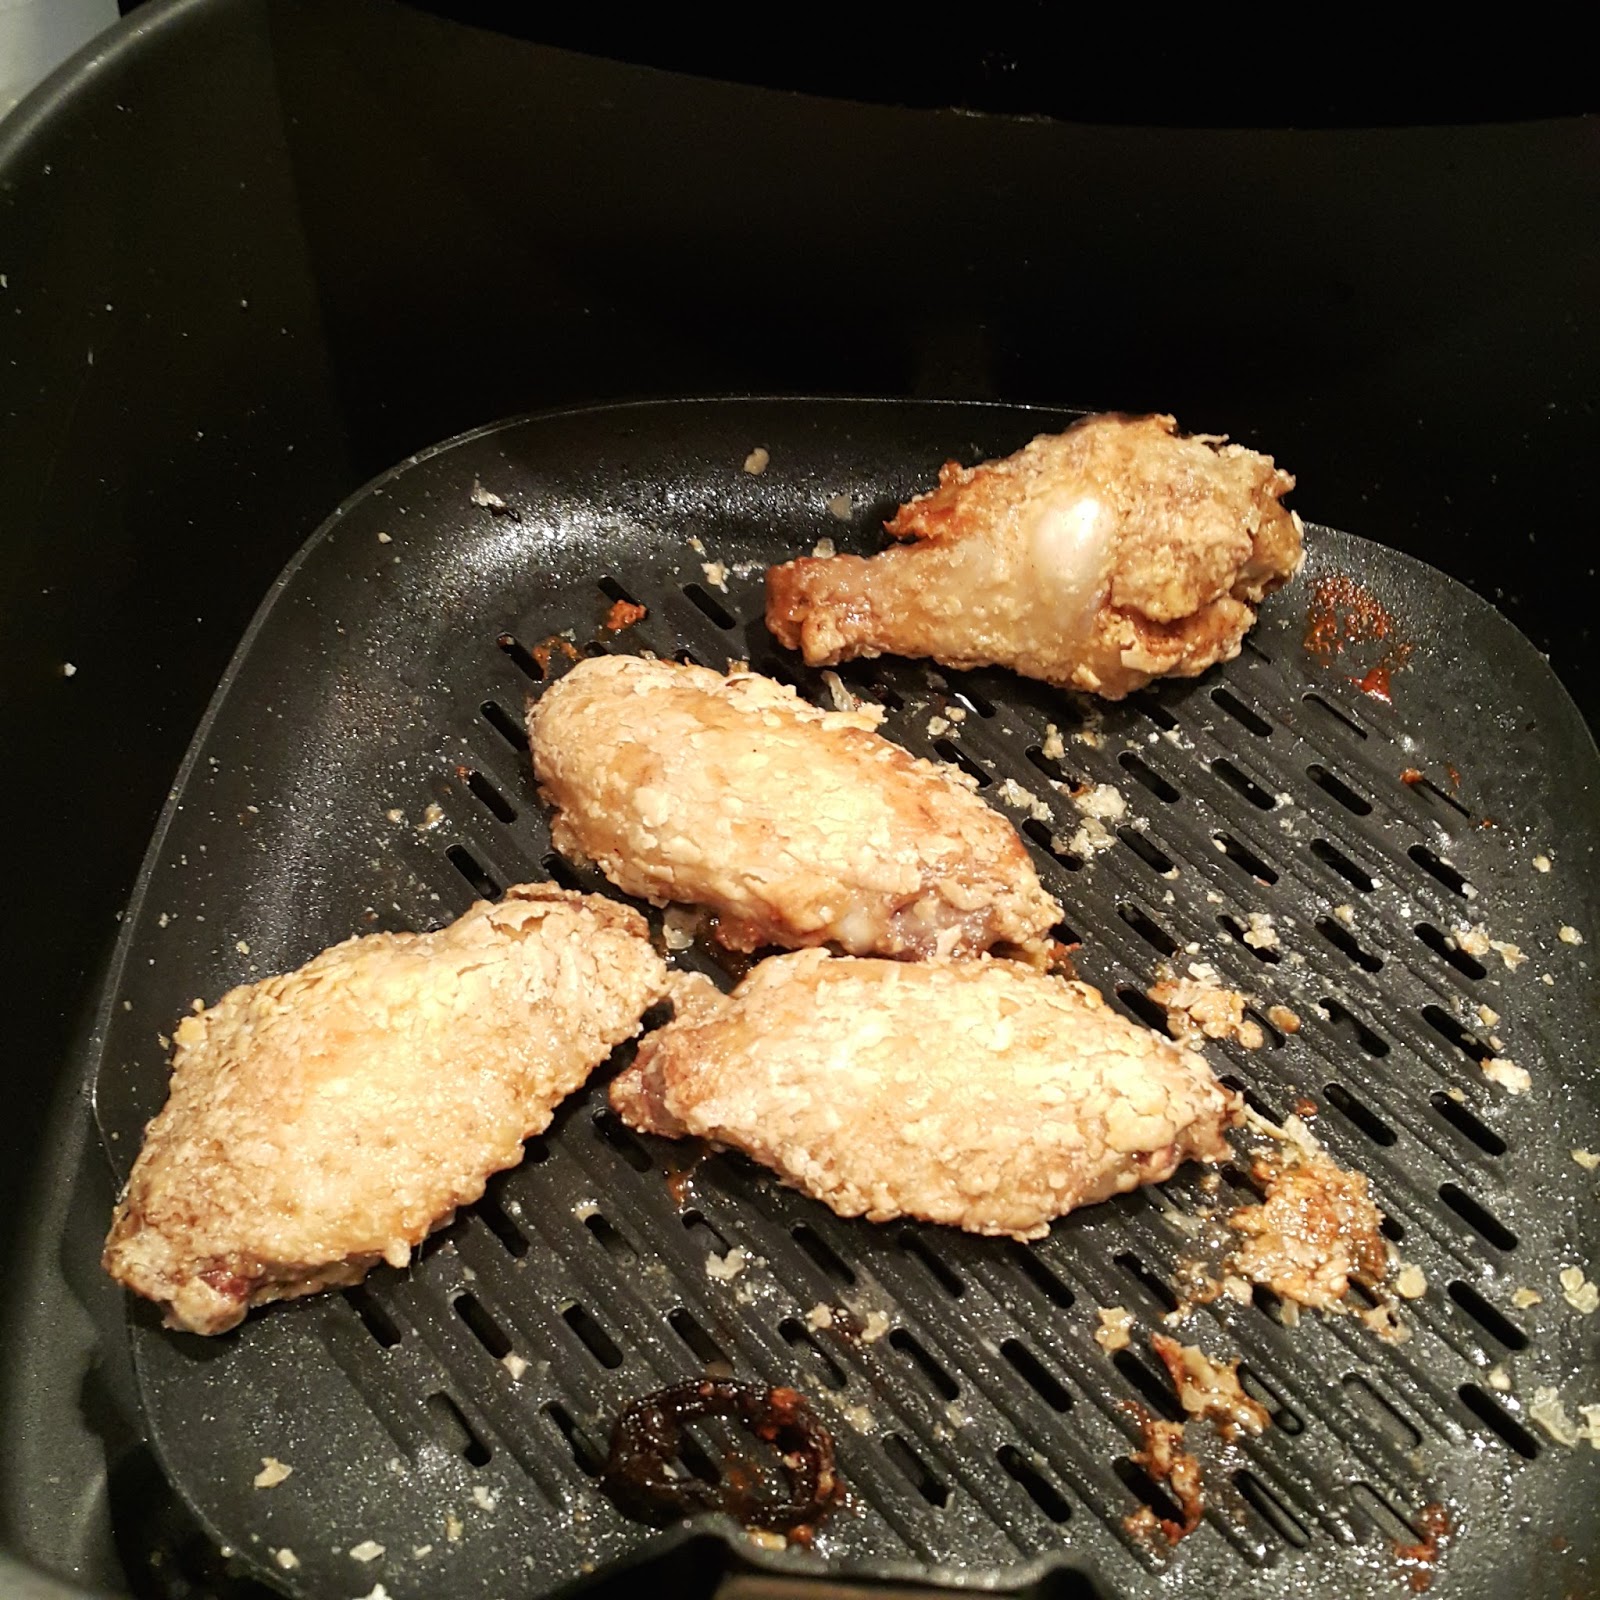
3. Pat corn starch on the surface of the wings, just a thin layer will do. Place into the grill pan and cook at 190ºC for 7 minutes
4. Open the Airfryer, place jalapeño and continue cooking at 190ºC for 5 minutes
5. Meanwhile, use a skillet or a frying pan to heat some olive oil, add garlic and cook until they are dry and crispy. Then add chili oil and maltose. Once the maltose started to melt, add the cooked wing and jalapeño in it and stir well until the sauce covers the wings. 
6. Serve on a plate, garnish with coriander. "Vamos a comer a mi amigo"!!


Step 3 


After cooking for 7+5mins at 190ºC


Saturday, May 9, 2015

COOK - 港式焗豬扒飯 Pork Chop with Fried Rice in Tomato Sauce Hong Kong-Style

港式焗豬扒飯唔知幾時開始成為我去快餐店嘅指定動作,佢有陣味真係好addictive,加上係焗,一定係熱辣辣,唔會食到我最憎嗰種半暖不熱嘅溫度。不過食得快餐店就預咗有好多唔健康嘅嘢加咗入去㗎啦。

有日因事要去長沙灣,路過一個小小菜檔,種類唔多,有些本地種的蔬果,樣子不美麗,但新鮮。在可以嘅情況下,我都希望幫襯小店當對本地小生意的支持。價錢很平,買了幾種菜,蕃茄都買了兩袋。返屋企試吃了一個蕃茄,有點青青的味道,不太好吃,就聯想到用來做汁最好。One leads to another,就諗到自己整個港式焗豬扒飯食喇。

自製個汁用鮮茄去皮慢煮而成,無人造色素無味精,好過食“大XX”。仲有,唔好唔記得個蛋炒飯底喎!


港式焗豬扒飯 (2人份)

醃豬扒:
豬扒 4塊
糖 2茶匙
白胡椒粉 2茶匙
鹽 2 茶匙
豆粉 1湯匙
水1-2湯匙

鮮蕃茄汁: 
蕃茄 5個 (4個做汁, 1個開四備用)
洋蔥 ½ 個 (切成小片)
蕃茄膏 1湯匙
糖 2茶匙
鹽 1茶匙
巴馬臣芝士碎 適量

炒飯:
雞蛋 2隻
冷飯 2碗

1. 用刀背將豬扒拍鬆,將豬扒跟調味料混合好,放入雪櫃醃半小時。
2. 製作鮮蕃茄汁要先將蕃茄去皮。方法是煲一煲滾水,用刀將蕃茄底部𠝹一個十字,放入滾水內,2分鐘左右皮就會翻起來,這時隔水放涼才除去蕃茄皮。
3. 將去皮蕃茄切成小粒,放入小煲內煮滾,然後收慢火開蓋煮約30分鐘。剩下的一個蕃茄開4份,洋蔥切小片,加入蕃茄汁內再煮5分鐘。加入蕃茄膏及糖,鹽 調味。
4. 準備炒飯。燒熱煎鍋下油,打入2隻蛋,不斷攪拌至凝固變成細片。放入飯拌勻及炒至飯鬆散成一粒粒,下鹽及胡椒調味。將飯放入焗爐耐熱容器內。
5. 用 Airfryer 200ºC 7 分鐘將豬扒烤熟至金黃色。取出切件,放上飯面。將步驟3的蕃茄汁倒上面。加上幾片巴馬臣芝士在頂。
6. 預熱焗爐至180ºC, 放入整個豬扒飯,焗約 5 分鐘或直至芝士溶化。
7. 原盤上桌,熱辣辣的港式焗豬扒飯完成!


Pork Chop with Fried Rice in Tomato Sauce Hong Kong-Style

The Pork
4 Pork Chops
2 tsp Sugar
2 tsp White Pepper
2 tsp Salt
1 tbsp Corn Starch
1-2 tbsp Water

The Sauce
5 Tomatoes (4 skinless for sauce, 1 for garnish)
½ Onion (chopped to small squares)
1 tbsp Tomato Paste
2 tsp Sugar
1 tsp Salt
Chopped Parmesan Cheese

The Fried Rice
2 Eggs
2 Bowls of Old Rice

1. Use the back of a knife to tenderize the pork chops. Mix the marinade and rub through the pork shops, let sit in the fridge for half an hour.
2. To make the sauce, boil a pot of hot water. Use a knife to slice a cross at the bottom of each of 4 tomatoes, set aside the extra one. Place the 4 tomatoes in the boiling hot water, after 2 minutes you’ll see the skins start peeling. Drain and let cool, then peel off the skins of the tomatoes.
3. Finely chop the skinless tomatoes into small dices, place in a saucepan. Once it starts boiling, turn to low heat and let simmer for 30 minutes. Cut the remaining tomato into 4 slices, and dice the onion. Add to the tomato sauce and cook for another 5 minutes, add tomato paste, season with salt and sugar to taste.
4. For the fried rice, in a hot pan, heat some oil and crack 2 eggs, stirring consistently until the eggs are set and become small pieces, add rice and stir well.  Cook until rice is hot. Season with salt and pepper if needed. Place the rice in an oven-safe dish.
5. Use an airfryer to cook the pork chop at 200ºC for 7 minutes. Once ready, slice into strips and place on top of the rice. Pour the tomato sauce in Step 3 on top and add a few slices of parmesan cheese as garnish.
6. Place the whole oven-safe dish into the oven that has been preheated to 180ºC, bake for 5 minutes or until cheese are melted and dish is hot.
7. Serve hot directly on the dish.


Wednesday, February 25, 2015

COOK - 減肥首選好鬼多菜雜菜湯 Healthy Hearty and Full of Goodness Minestrone

新年前後,食咗好多又肥又滯又油膩嘅嘢,係時候要清清腸胃。咁減肥又唔代表要捱餓或者食啲好難食嘅嘢嘅。
喺肥過架電單車之前,整咗呢個好鬼多菜嘅Minestrone雜菜湯,又飽肚又好味,整一大煲可以飲幾日,有營養又清腸,回復體態無難度!

相片材料與真實份量不同,純萃覺得靚啲 :)
Actual proportion of ingredients is different from this image

好鬼多菜雜菜湯 (3L)

蒜頭 3瓣 (拍散)
洋蔥 1個 (切大片)
紅蘿蔔 2條 (去皮切1cm厚片)
車喱茄 20+粒 (切半)
椰菜 半個 (切大片)
薯仔 1大個 (去皮切粒)
西芹 1條 (切大片)
雞湯** 500ml
水 2L
茄膏 2湯匙
鹽 少許

(**認真減肥人士或素食人士就唔用雞湯,用水代替)

1. 將以上材料切好準備好
2. 大湯鍋內加1湯匙橄欖油,中火將蒜頭和洋蔥爆香,然後加入紅蘿蔔,車喱茄,椰菜,薯仔和西芹 (認真減肥人士就油都唔落,直接將所有材料放入鍋內)
3. 倒入雞湯和水,煲至大滾後轉細火煲2小時。
4. 最後加入茄膏再大滾多15分鐘,加鹽調味即成。

祝各位體態完美! 


Healthy Hearty and Full of Goodness Minestrone (Makes 3L)

3 Cloves Garlic (crushed)
1 Onion (cut into big pieces)
2 Carrots (peeled and sliced)
20+Cherry Tomatoes (halved)
1/2 Cabbage (cut into big chunks)
1 Big Potato (peeled and cubed)
1 Celery (sliced)
500ml Chicken Stock**
2L Water
2 tbsp Tomato Paste
Salt for tasting

(**Vegetarian or people who are serious on their diet can replace chicken stock with water)

1. Clean, cut and prepare all the above ingredients
2. In a big pot, heat 1 tbsp olive oil, fry garlic and onion over medium heat until aroma develops. Add carrots, cherry tomatoes, cabbage, potatoes and celery. (Serious dieter can skip the olive oil and frying process, simply throw all the ingredients into the pot)
3. Fill the pot with chicken stock and water, turn to high heat and let boil. Once boiling, reduce to low heat and cook for 2 hours. 
4. Add tomato paste and stir well, turn to high heat and let boil for another 15 minutes. Add salt to taste and serve. 

I wish you a Perfect Curvy Body Shape!! :D


Wednesday, January 14, 2015

COOK - 烤焗蕃茄肉丸螺絲粉 Baked Fusilli with Meat Balls and Tomato Sauce

Baked Fusilli with Meat Balls and Tomato Sauce (English recipe at bottom of page)

跟烤超級無敵巨型虎蝦一起煮的是烤焗蕃茄肉丸螺絲粉,這道菜式很適合廚房新手做,因為很多材料用現成的便可以,零失敗。


螺絲粉 200g
蒜頭  2瓣 (切碎)
乾蔥 1粒 (切碎)
車喱茄 10數粒 (切半)
IKEA 急凍肉丸 10粒
蕃茄羅勒意粉醬 300ml
馬蘇里拉芝士(mozzarella cheese) 適量
新鮮羅勒(fresh basil) 1-2塊

1. 用一大鍋煲一鍋滾水,加入2茶匙鹽。水滾加入螺絲粉,根據包裝指示時間煮至嚼勁。約9分鐘,隔水備用。
2. 切好蒜頭,乾蔥和車喱茄。
3. 一平底鍋內加入橄欖油1湯匙,燒熱後放入蒜頭和乾蔥,炒至金黃色加入車喱茄和肉丸,蓋上鍋蓋中慢火煮,直至肉丸變軟。
4. 將煮好的螺絲粉加入,再倒入蕃茄羅勒意粉醬拌勻。加入鹽和胡椒調味。
5. 將意粉倒入耐熱容器,表面灑上馬蘇里拉芝士,放入180度焗爐焗約3分鐘至表面微焦取出。
6. 如有新鮮羅勒,切絲灑上表面即成。
*想吃上去有意大利地道感覺,緊記意粉不要煮得太林,這樣才有Al dente 的感覺


RECIPE

200g Fusilli 
2 cloves of Garlic (chopped)
1 Shallot (chopped)
10+ Cherry Tomatoes (halves)
10 Frozen Meatballs
300ml Tomato & Basil Pasta Sauce
Mozzarella Cheese
1-2 leaves of Fresh Basil (Chopped)

1. Boil a big pot of water with 2 tsp of salt. Add Fusilli and cook according to package instruction until al dente. About 9 minutes, drain and set aside.
2. In a frying pan, add 1 tbsp of olive oil, pan fry the garlic and shallot until golden brown. Add cherry tomatoes and meat balls, cover and cook until meat balls are soft over medium-low heat.
3. Add the drained Fusilli and the pasta sauce, still well and season with salt and pepper.
4. Preheat oven to 180C, place pasta in an oven-safe container, sprinkle mozzarella on top and put into the oven for about 3 minutes, or until the cheese are melted and slightly browned.
5. Garnish with chopped basil and serve.

Bon appetit!