Meals on a Loveseat

Meals on a Loveseat
最新食譜「美味在一起」現已於各大書店及amazon.com有售 "Meals on a Loveseat" is on sale at HK bookstores and at amazon.com now

Pages

Showing posts with label Cake. Show all posts

Wednesday, January 13, 2016

EAT - 日本青森弘前蘋果批

蘋果。。是青森県的特產。蘋果批更化身各種式樣出現於市內各處,在大雪下很努力地走訪了3間著名餅店,有的外皮較鬆脆,有的蘋果較甜,有的肉桂味濃,看哪一款合你口味。

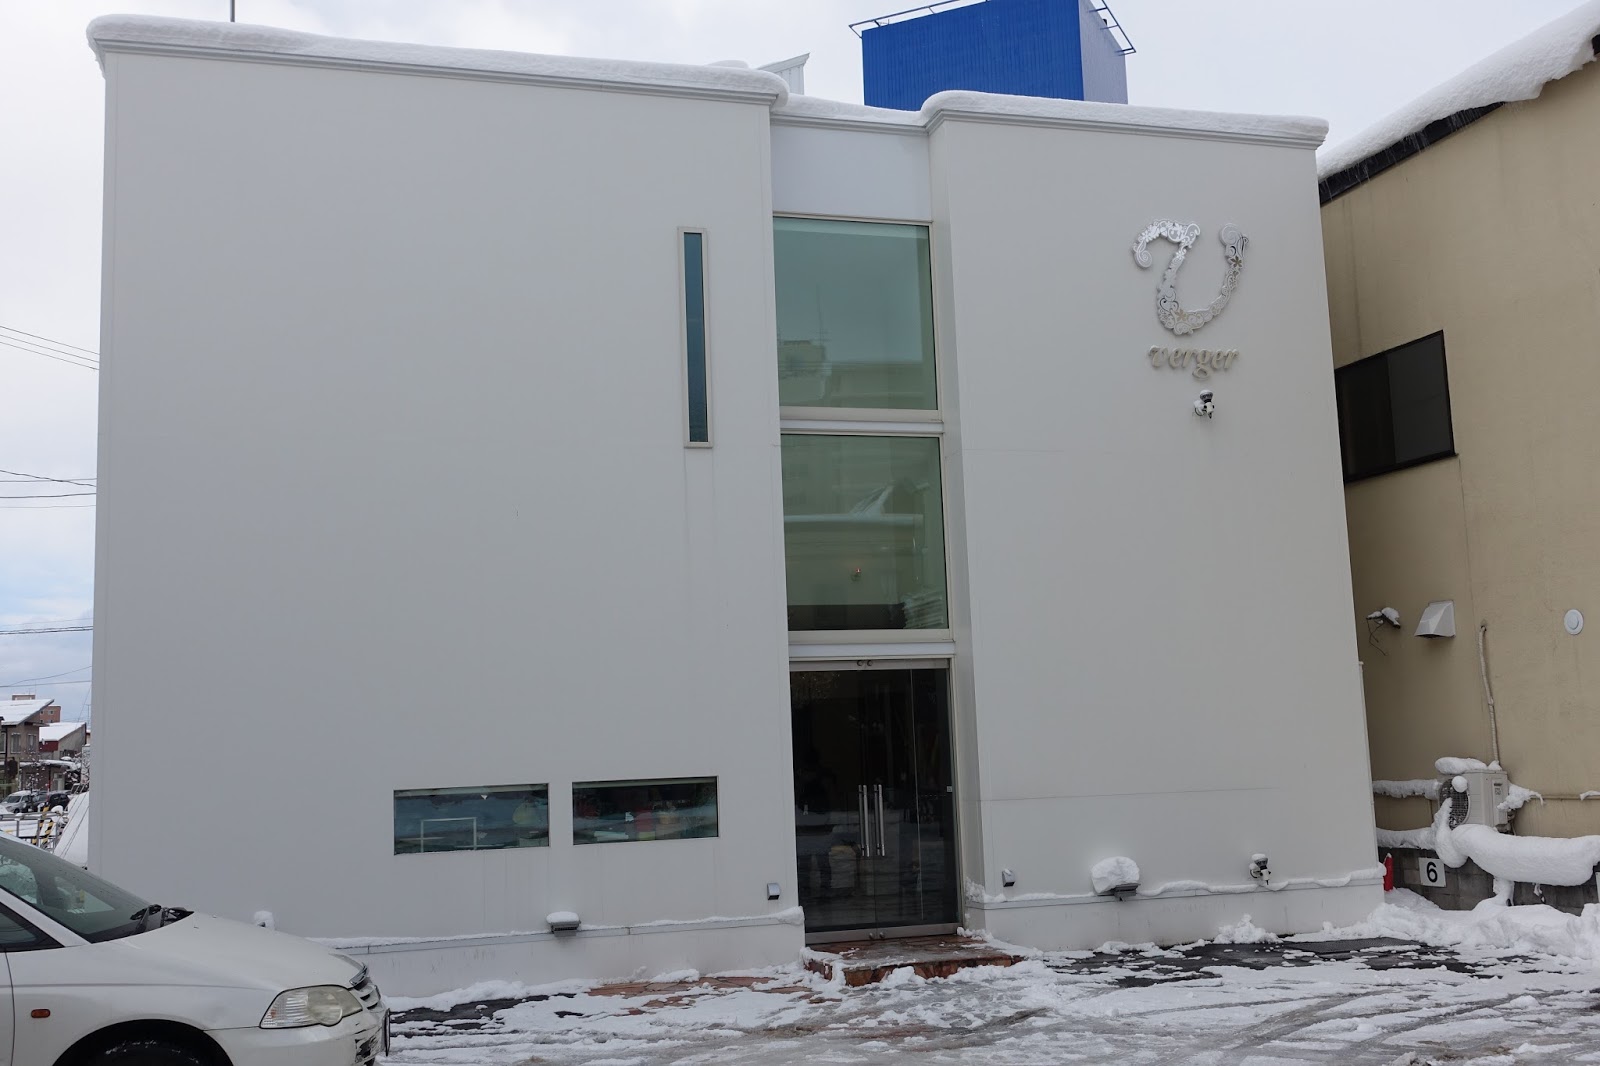
第一家是Verger。想不到是一棟式的大餅店,走入內才發現不是專買蘋果批,而是各式各樣西式精緻蛋糕西餅。

只是買了一件也包裝得如此精緻
 Verger蘋果批的賣點是用窯燒,外皮酥香帶甜,蘋果是粒狀微酸,有輕度的肉桂味。
Verger蘋果批
Name: パティスリーヴェルジェ(Patisserie Verger)
Address: 弘前市百石町18
Tel: 0172-32-1949
営業時間 10:00~19:30
毎週月曜定休日(祝日の場合翌火曜日)
http://verger.muse.weblife.me/#id78


走訪第二家的是 Patisserie Le Chocolat,這一件是呈長條狀,酥皮在兩邊,蘋果是片狀的,比較甜,但沒有肉桂味,酥皮也是很有層次。
Patisserie Le Chocolat 蘋果批
Shop Front (*photo captured from internet)
Name: Patisserie Le Chocolat
Address: 青森縣弘前市12-1 Yamashitacho036-8011
Tel: +81 172-37-6761


天氣很冷,想找咖啡店休息一下,誰知走了幾家也關了門,正在氣屢想乘巴士回酒店時,竟在巴士站側的小巷裡發現旅遊書有介紹,十分有名的“万茶ン”有開門。万茶ン之所以有名是因為當年著名小說《人間失格》的作家:太宰治也常到這裡喝咖啡寫作找靈感。

 是舊式典雅咖啡廳格局

這裡也賣蘋果批,是比較傳統的外貌。批皮不是酥皮,有點實,蘋果是大粒狀,每顆都被重重的肉桂味包著,酸甜度是中度偏甜。
万茶蘋果批
也需介紹一下這杯咖啡,它是“太宰咖啡”。說是太宰治每次來也喝的,十分濃厚辛口,難到作家都是依靠咖啡因而活的罷。
太宰咖啡


Name: 万茶ン
Address: 青森県弘前市土手町36-6
Tel: 0172-35-4663


Tuesday, September 29, 2015

COOK - 無牛油日式蜂蜜蛋糕カステラ Japanese Honey Castella

很多朋友去日本回來也會買長崎蜂蜜蛋糕或抹茶蜂蜜蛋糕作手信。
況且秋天來了,吃蜂蜜感覺特別滋潤,來抵抗變得乾燥的天氣。
我研究了這個食譜,完全没有牛油和泡打粉,只需用4個器皿便可做到這種日式人氣蛋糕みつカステラ呢!


《無牛油日式蜂蜜蛋糕カステラ》


牛奶  50ml
蜜糖  25ml
蛋白  3隻
蛋黃  3隻
糖  110g (少甜版,可加至135g)
高筋粉  100g
長方形模具:10cm x 17cm x 5cm

1. 將牛奶和蜜糖放入小煲內用小火煮暖至蜜糖溶化。離火備用。

2. 蛋白用電動打蛋器打至7-8成企身,將100g糖分3次混入蛋白中,打至變成全白色企身。
3. 另一碗內將剩餘的10g糖和蛋黃混合,打至起泡。
4. 將蛋黃混入牛奶蜜糖中拌勻。
5. 輕輕將步驟2的蛋白混入牛奶糊中。
6. 高筋粉過篩,輕輕地摺入牛奶糊中,直至完全混合,沒有結塊。
7. Airfryer預熱至160ºC。長方形模具噴油,將麵糊倒入模中。
8. 用160ºC焗30分鐘。(如用焗爐可試160ºC 40分鐘,當然焗爐不同類別,大小或品牌的溫度都有所差異,請自行調節。)
9. 準備一張焗爐紙放在平面上,把蛋糕從爐內取出倒轉,蛋糕面在焗爐紙上,模底向上。用重物壓著模底表面放涼。
10. 放涼後脫模,切走左右兩面多出的蛋糕,形成一條長方條。再切成同等厚度的蛋糕片。可用保鮮紙包著放入雪櫃,保持濕度,風味更佳。


《Japanese-Style Honey Castella》

50ml Milk 
25ml Honey
3 Egg Whites
3 Egg Yolks
110g Sugar for less sweet version (or add up to 135g)
100g Bread Flour
Rectangular Mold Size: 10cm x 17cm x 5cm

1. Heat milk and honey over low heat until honey melted. Turn off heat and set aside.
2. Put egg whites in a clean bowl and whisk with an electric hand mixer until stiff. Add 100g sugar, 1/3 at a time while whisking until stiff peak forms.
3. In a separate bowl, beat egg yolks with the remaining 10g sugar until frothy.
4. Add egg yolk to the milk and honey, mix well.
5. Fold the egg white into the milk and honey mix gently.
6. Add sifted bread flour into the mix and fold until no lumps.
7. Preheat Airfryer to 160ºC*. Grease mold and pour the mixture into the mold and bake for 30 minutes at 160ºC.
8. Turn mold upside down on a baking paper and use something heavy to compress onto the bottom of the mold. Let cool. 
9. Remove the mold. When serving, slice the sides, then into pieces. Now you have your Japanese Honey Castella ready.

Useful Tips:
* For those using an oven, you can try baking at 160ºC for 40 minutes. However, oven sizes, brands and types do vary in temperature, please make the appropriate adjustment. 
1. Use a toothpick to pinch into the cake, if no residue is clinging onto the toothpick, the cake is cooked.

2. For the remaining castella, wrap with plastic wraps and place in the fridge to retain moistness. 
 

Friday, September 25, 2015

COOK - 西蘭花紅蘿蔔芝士鬆餅 Savory Broccoli, Carrot and Cheese Muffins


鬆餅你一定吃過,不是藍莓的便是朱古力的。可是你知道鹹的鬆餅也好好吃嗎?用上慢磨果汁機壓榨成的果渣,快捷地便可將餡料平均壓碎但仍然保留著營養和纖維,製作時間縮短至半小時內,然後放入焗爐便成。有朋友到訪作為招待茶點,新鮮出爐熱烘烘的,更顯心思。


《西蘭花紅蘿蔔芝士鬆餅》Savory Broccoli, Carrot and Cheese Muffins
(可做9個底部直徑7厘米的鬆餅)


材料:
西蘭花 ~50克 (去莖只用菜的部份)
小紅蘿蔔 ~60克 (已去皮的)
高筋粉 120克
低筋粉 120克
泡打粉 12克
蘇打粉 3克
鹽 1½茶匙
雞蛋 2隻
牛奶 300毫升
無鹽牛油 80克 (已溶)
軟芝士碎 150克

1. 把西蘭花切成小份,放入一煲已加鹽的滾水內灼軟。隔水備用。

2. 將螺旋擠壓器換上果汁濾網,把西蘭花和小紅蘿蔔放入慢磨果汁機內壓榨成汁和果渣。果渣備用。


3. 將高筋粉,低筋粉,泡打粉,蘇打粉及鹽放入一碗內混合好。

4. 在另一大碗內,把雞蛋打散,加入牛奶,步驟2的果渣,牛油和芝士碎拌勻。


5. 慢慢將步驟3的粉加入步驟4內,攪拌至粉類融入,變成糊狀。


6. 預熱焗爐至175ºC

7. 將糊用湯匙放入鬆餅杯內至8成滿。


8. 放入焗爐175ºC 約30分鐘,焗至鬆餅脹起並且表面金黃便可。用牙籤插入無黏著物便代表熟了。


註1:溫度根據焗爐不同類別,大小或品牌有所差異,請自行調節。
註2:照片只供參考,不代表實際份量。


Friday, September 11, 2015

COOK - 紅菜頭朱古力蛋糕 Beetroot Chocolate Cake

其實我唔鍾意紅菜頭。。。
因為佢會甩色!hahaaa...

不過紅菜頭的營養價值真的很高:高鈣,鐵,維他命A同C,高纖維,0 脂肪,降血壓,最重要是抗養化,保年輕都靠它了!

Beetroot 紅菜頭原來除了可以用來做沙律之外,還可以做蛋糕呢!利用Nigel Slater 的recipe 改一下,再用Airfryer焗了這個“Beetroot Chocolate Cake”,外面香脆裏面又soft又moist,好好吃啊!隻手紅一下也沒所謂了!


紅菜頭朱古力蛋糕

材料:
紅菜頭  130克
70% 黑朱古力粒  100克
無鹽牛油  100克
意式濃咖啡  40毫升
低筋麵粉  70克
泡打粉  1/2茶匙
可可粉  1湯匙
蛋黃  2隻
蛋白  2隻
糖  90克

1. 紅菜頭去皮,放入慢磨榨汁機,榨成汁和渣。取120克渣和10克汁混合成糊狀。(沒有慢磨榨汁機的可連皮放入水中煮30分鐘,去皮切粒再放入攪拌機攪爛後使用)
2. 煲內放熱水,隔水放上一大碗,將朱古力放入碗內座溶。倒入熱的意式濃咖啡。

3. 牛油切粒放入朱古力中,離水放好。待牛油溶化後加入紅菜頭。


4. 將低筋麵粉,泡打粉和可可粉混合過篩備用。
5. 蛋黃和蛋白分開盛放。將蛋黃打至起泡,混入朱古力漿中拌勻。
6. 蛋白分次放入糖用打蛋器打至企身。

7. 將蛋白慢慢拌入朱古力漿中,再拌入步驟4的麵粉至溶化。


8. 預熱AF至180ºC。AF焗盤底部放牛油紙和噴油,倒入朱古力漿。

9. AF 180ºC 焗35分鐘,拿出放涼。吃時配鮮忌廉同吃更美味。


Beetroot Chocolate Cake


130g Beetroot (blended to become a paste)
100g 70% Dark Chocolate Drops
100g Unsalted Butter
40ml Espresso Coffee
70g Cake Flour
1/2tsp Baking Powder
1tbsp Cocoa Powder
2 Egg Yolks
2 Egg Whiles
90g Sugar

1. Peel the beetroot and using a slow juicer to extract the juice and pulp. Take 120g of the pulp and 10g juice, mix them up to become a paste. (If you do not have a slow juicer, you can cook them in hot water for 30 minutes with skins, then peel and diced, and put into a blender). 
2. Melt the chocolate in a bowl suspended over a pot of shallow hot water, pour espresso. 
3. Dice the butter and put into the chocolate mixture, remove from heat. When the butter is melted, stir well and add the beetroot. 
4. Mix flour, baking powder and cocoa powder and sift through. 
5. Separate the egg yolk and white. Beat the egg yolk until frothy, stir into the chocolate mix. 
6. Beat the egg white with a hand mixer, add sugar and work until it becomes a soft peak. 
7. Carefully fold the meringue into the chocolate mixture, then fold in the powder in Step 4. 
8. Preheat Airfryer to 180ºC. Line the bottom of the tin with a baking paper, and grease the tin. Fill the batter into the pan.
9. Cook with Airfryer at 180ºC for 35 minutes, let cool and best served with fresh cream.


Saturday, August 15, 2015

COOK - 香蕉朱古力旋風蛋糕 Banana Chocolate Swirl Cake

夏天天氣熱,買回來的香蕉明明是青色的,第二天就變黃,再隔一天就出斑點了!蕉熟得快又趕不及吃掉,最好用來消滅它的方法就是做蛋糕了!之前做過了幾次Banana Loaf有點悶,今次加點新意,加一個小工序便變成新口味的香蕉朱古力旋風蛋糕。


香蕉朱古力旋風蛋糕

熟香蕉  2條
低筋粉  150g
泡打粉  4g
蘇打粉  1g
鹽  1小撮
無鹽牛油  80g (已溶)
糖  80g (少甜版,可加至100g)
雞蛋  2隻
烹調用黑朱古力粒  40g (隔熱水座溶)

1. 將香蕉切片壓成茸
2. 低筋粉,泡打粉,蘇打粉和鹽混合過篩 
3. 在一大碗內把糖加入溶牛油內,用電動打蛋器打勻。再逐一加入雞蛋。
4. 把香蕉茸和麵粉加入步驟3的材料內,混合至沒有粉粒。
5. 黑朱古力粒放入盛器內隔熱水座溶,將步驟4內之1/3粉漿與朱古力漿混合。
6. 焗盤噴油,先倒入一半黃色粉漿,加入一半朱古力漿,再倒入其餘黃色粉漿,最後再加入剩下的朱古力漿。用刀垂直在粉漿內輕輕畫成旋風狀。
7. Airfryer預熱150ºC,把焗盤放入焗45分鐘。如插入牙籤拿起沒有粉漿黏著便熟了!
8. 在架上放涼即可。


Banana Chocolate Swirl Cake

2 Ripe Bananas (mashed)
150g Cake Flour
4g Baking Powder
1g Baking Soda
A pinch of Salt
80g melted unsalted Butter
80g Sugar (this is a less sweet version, you can add up to100g)
2 Eggs
40g Dark Chocolate Drops (melted)

1. slice and mash the bananas
2. mix flour, baking powder, baking soda and salt, set aside.
3. In a big bowl, use an electric mixer to beat the butter and sugar until light and fluffy. Then add eggs one at a time. 
4. Add the mashed banana and the flour mixture on low speed until just combined. 
5. Melt the dark chocolate in a hot water bath. Add 1/3 of the batter in Step 4 to the chocolate. 
6. Grease the loaf pan with butter, first pour half of the batter into the pan, then half of the chocolate. And again, the remaining batter and the chocolate alternatively. Swirl the batters together by inserting a knife up and back 4-5 times. 
7. Pre-heat Airfryer to 150ºC. Bake for 45 minutes or until a toothpick comes clean. 
8. Let cool on a wired rack and serve.


Tuesday, May 19, 2015

COOK - 用Airfryer做抹茶雪芳蛋糕 Green Tea Chiffon Cake

因為我家無焗爐,又無位放,又唔太食甜嘢,所以好少整蛋糕。
買咗新玩具Airfryer就要試吓整唔同種類嘅嘢試吓佢嘅function。
在櫃頂唔覺意揾到一個Chiffon Cake 模,於是就冒住失敗嘅危險,勇往直前整一個放入AF焗!
點知竟然成功地利用AF整到一個成型又幾軟熟嘅抹茶雪芳蛋糕出嚟喎。

By the way, 我的AF是大size,整到5吋模,唔肯定細size放唔放得到,不過我放入去時仲有好多位,應該OK的。(剛收到朋友反映鐵模透氣位高得滯入唔到AF,我用的是紙模,可在$12店或ccsuper買到)

就在今日,就在此地,同大家分享一下!


Airfryer 抹茶雪芳蛋糕 (5吋雪芳蛋糕模)

低筋粉 75g 
抹茶粉 12g 
蛋白 3隻
糖 80g (少甜放60g)
蛋黃 3隻
菜油 40ml
水 60ml

1. 低筋粉和抹茶粉拌勻,過篩 。
2. 蛋白放入碗內,用電動打蛋器打至起泡變白色。分3次加入糖繼續打至蛋白企身。
3. 另備一個碗放入蛋黃,菜油和水,輕輕發至混和。將步驟1的材料逐步加入,用打蛋器打至變成沒有結粒的黏黏粉漿。
4. 將步驟2的蛋白分次卷入粉漿中,輕輕的混合至見不到有蛋白泡泡。
5. 預熱AF至170ºC*,3分鐘。
6. 將粉漿倒入雪芳蛋糕模內,約8成滿。放入AF*,170ºC 20分鐘,後轉160ºC 8分鐘。用牙籤插入蛋糕,沒粉漿黏著便熟了。
7. 將蛋糕倒扣放涼。脫模。
8. 切件配合日式紅豆和忌廉同吃。

(*如用焗爐,可用180ºC焗30分鐘。再次重申,因不同焗爐大小或型號會有溫差,請自行調教。)

Have a Green-tea Day! 


Green Tea Chiffon Cake

75g Cake Flour
12g Matcha Powder
3 Egg Whites
80g Sugar (use 60g for a less sweet version)
3 Egg Yolks
40ml Vegetable Oil
60ml Water

1. Mix cake flour with matcha powder and sift through.
2. Put egg whites in a clean bowl and whip with a egg beater until foams develop, add 1/3 sugar at a time while whipping until stiff peaks form.
3. In a separate bowl, beat egg yolks with vegetable oil and water. Add the matcha cake flour mix in Step 1 and beat until the mixture becomes glutinous with no lumps.
4. Add the whipped egg whites from Step 2 into the cake mix in a few batches, carefully fold the egg whites in without over mixing.
5. Preheat AF to 170ºC*
6. Pour the mixture into a chiffon cake mold until 80% full and bake for 20minutes at 170ºC, then 8 minutes at 160ºC. Insert a toothpick into the cake, if no residue is clinging onto the toothpick, the cake is cooked.
7. Turn it upside down and let cool. Remove the mold.
8. Serve with Fresh Cream and Azuki Red Beans.


(* If using a conventional oven, preheat to 180ºC and bake for 30 minutes. Since the temperature varies among different sizes and brand of ovens, please do make the appropriate adjustment)

Have a Green-tea Day!