Meals on a Loveseat

Meals on a Loveseat
最新食譜「美味在一起」現已於各大書店及amazon.com有售 "Meals on a Loveseat" is on sale at HK bookstores and at amazon.com now

Pages

Friday, January 23, 2015

COOK - 賽螃蟹 Stir-fry Egg White with Conpoy

午餐做Eggs Benedict 用了蛋黃,剩下來的蛋白不要丢掉,晚上吃“賽螃蟹”(but without蟹=瑤柱炒蛋白),物盡其用!

這個菜式重點是清香白滑,所以我也只用了鹽去調味,瑤柱已有獨特的海鮮味,不多加其他調味了。
由於本人是對蟹有過敏反應,就不加蟹了,你喜歡的話可在下瑤柱時加蟹肉一齊炒再下蛋白。
看似簡單的菜式,技巧全在炒蛋白的火候和速度,否則蛋白很容易變老就鞋㗎喇。


Ingredients:
4 Conpoy (Dried Scallops)  (soaked, tear into threads)
6 Egg Whites 
1-2 tsp Sea Salt 


1. Soak any moist remaining on the conpoy. Take 1/3 of the conpoy for deep frying.

2. Beat the egg white with salt.

3. Heat a pan with 3 tbsp of oil, add 1/3 of the conpoy and fry until they become brown and crispy. Drain and place on a paper towel to absorb the excess oil. Sprinkle a pinch of salt and set aside.

4. In the same pan, use the remaining oil to cook the egg white. Pour the remaining conpoy (plus crab meat if you are using) and all the egg white into the pan, cook in medium heat. Once the bottom of the egg white started to set, use a spatula to scrape from the bottom to the top, and let the remaining liquid to slide to the bottom and cook until set. Repeat until all liquid became solidified. (Be careful you need to scrape the solidified egg white as soon as it’s set, or else it would be overcooked and wouldn’t get the smooth texture).


5. Serve on a plate and garnish with the crispy fried conpoy.


COOK - 班尼迪蛋 Eggs Benedict

Eggs Benedict 班尼迪蛋真是世上最難整的早餐之一,Master Chef 入面8個有6個失敗,不是蛋poach得太生便是太熟,又或那個Hollandaise Sauce 分解了,一係就杰到變Mayonnaise。
真正實戰整Hollandaise Sauce 是在上法國廚藝班時,之後自己都試過整一次,但真係太煩,事隔2年,忽然挑起條筋又想整一次。


我用了iberico ham來取代maple ham。而那個hollandaise也是驚險萬分,本來個sauce做好了,天氣涼,我怕淨係蓋住碗面都未能保溫,就一直座在暖水上,本來都仲ok,點知道poach完兩隻蛋,正要用個汁時一看!! Split了!! 好在,用了一個小技巧**還挽救得到,總算過關了!


班尼迪蛋

英式鬆餅1塊 (切半)
雞蛋2隻
火腿 2塊#
# 我用了14個月的 Iberico Ham (不必用太靚的24個月或以上,因為蛋汁也會蓋過味道)
也可用菠菜做成 Eggs Florentine,也可用Smoked Salmon取代,隨你喜歡。但不要用質地太硬或太韌的食材,以免影響吃時的口感。

1. 鬆餅放焗爐或煎鍋烤熱至表面香脆。火腿也用煎鍋烤熱表面。(我用Iberico Ham就可省卻烤熱步驟)
2. 燒熱一大鍋滾水,加1tbsp鹽(有人會用醋,同樣可以凝固蛋白)。一個碗放上筲萁(sieve),雞蛋打在sieve上隔走比較液體狀的蛋白,做水波蛋時會比較整齊美觀。
3. 水放入蛋,用筷子攪動令水形成漩渦,約3分鐘左右撈起。(確實時間很視乎蛋的大小,是否剛從雪櫃拿出來和個人喜好而定,撈起就篤下表面,憑直覺感受一下吧)
4. 先放英式鬆餅在底,加上火腿,再放上水波蛋。最後淋上Hollandaise Sauce在面。

Hollandaise Sauce
白酒醋 30ml
牛肉清湯 30ml
水40ml
原粒黑椒 12粒
蛋黃2隻
牛油清 100g
鹽 小許
紅椒粉 小許
檸檬汁 小許

1. 一湯煲放入白酒醋,牛肉清湯,水及原粒黑椒煲滾,直至水分蒸發變成剩下一半。隔渣備用。*
2. 牛油放入小鍋內煮溶,會有點白色的泡泡或粒粒,將它們隔走。剩下的就是牛油清了。放涼一點備用。
3. 一個煲放入約2吋高的水,煲至微微起泡,找一個耐熱不易破的碗又剛好碗邊能卡在煲邊,底部能座著熱水。好了,來了!將蛋黃放入,加入2茶匙剛才的濃縮醋,用打蛋器不停發至起泡。這時拿出熱水外,將一湯匙牛油清倒入,放回熱水座,繼續發。如是者,出熱水外,倒入牛油清,放回熱水座,不停發,直至汁變成杰杰的。最後才加入鹽,紅椒粉和兩滴檸檬汁調味。淋上水波蛋面即成。
* 剩下的濃縮醋可放入乾淨的瓶內再用。
** 剛才說的小技巧是什麼呢?就是萬一發發下的時候發現蛋和牛油分離了,一部份一舊舊,一部份是液體,便立刻找另一隻碗倒入,加一小匙冰水,繼續瘋狂地發,那應該可以還原。

畢竟,我都是將我所知的和自己的經驗寫出來,最後還是實戰最重要,憑自己的感覺煮食,得來的成功是快樂和滿足的!


Eggs Benedict

1 English Muffin (Halved)
2 Eggs
2 Slices of Maple Ham#
# I used 14-mths Iberico Ham instead (It's not necessary to use those super good quality of over 24 mths' as the egg juice is going to cover the taste anyway). Or you can use spinach to replace the ham and become Eggs Florentine, or Smoked Salmon, or anything you like. Just be aware not to use ingredients that are too tough or too hard to bite off as they don't go in harmony with the soft eggs and the crispy English muffin.

1. Toast the muffin in the oven or frying pan until warm and crispy. Toast the ham in the frying pan also. (As I am using the Iberico ham, so I can skip toasting the ham here)
2. Boil a big pot of water, add 1 tbsp salt (some use vinegar that can also solidify the egg whites, but I personally prefer salt). Break the egg on a sieve to drain the liquidy egg white away, so that when doing the poach egg, the presentation will be nicer and no excessive whites clinging to the egg.
3. Use a spoon or chopsticks to stir the boiling water and make a swirl. Place the eggs inside and let cook for around 3 minutes, pick up the eggs with a slotted spoon. (It's hard to say the exact timing, it depends on the size of egg, whether it's directly from the fridge or your personal preference. Just gently poke the egg and use your instinct)
4. On a plate, place english muffin at the bottom, then ham, then poach egg on top. Finally, pour Hollandaise sauce on top to serve.

Hollandaise Sauce
30ml White Wine Vinegar
30ml Beef Stock
40ml Water
12 Peppercorns
2 Egg yolks
100g Clarified Butter
A pinch of Salt
Paprika
2 drops of Lemon Juice

1. Fill a pot with the vinegar, stock, water and peppercorn, reduce to half. Drain and set aside.*
2. In a saucepan, melt the butter. Spoon away the white substances. The remaining is clarified butter, let cool a bit and set aside.
3. In a pot, fill 2 inches water and let boil. Find a heatproof bowl that could fit inside the pot and that you can pick up the rim of the bowl easily. Reduce the heat to let the water in the pot simmer. Here we go! Place the egg yolks in the bowl, add 2 tsp of the reduced vinegar. Put the bowl inside the pot, whisk vigorously until the egg are becoming bubbly. Take the bowl out of the pot, add 1tbsp of the butter, whisk, back in the pot, whisk. Continue doing the same procedure and adding butter until the sauce is incorporated and become a smooth thick sauce. Add salt, paprika and 2 drops of lemon juice at the end and fold into the sauce.
4. Spoon the sauce on top of the poach eggs and Voilà! Eggs Benedict!

* The remaining vinegar can be kept in a clean bottom and be reused.
** The little trick when you find the sauce staring to split: scrape the sauce to another clean bowl and add a small spoonful of ice water and keep whisking, it should be able to combine and back to how it should be.

After all, real practice makes things perfect, just by reading a recipe wouldn't get you anywhere unless you are really making it. All I can do is to share what I know and what I have been through in here, use your instinct and you will discover the joy in cooking! 


Tuesday, January 20, 2015

COOK - 泰好味之紅咖喱鷄+黃薑飯 Thai Red Curry with Chicken & Turmeric Rice


可能由於我是寒底,天氣涼就會想吃點辣的。
早一日飯聚過後還早,剛好那個商場有間超市,便走去逛逛。買了半雞,想想用來做什麼菜式好呢?剛又在fb看到朋友去泰國度假的相片,又陽光海灘,又比堅尼,我就包到糭一樣,恨得我牙癢癢!I need a tan!!! 說回正題,很久沒有做泰菜了,就做咖喱雞吧!


斬件雞  半隻
泰國紅咖喱醬料 30-35g (怕辣可減少)
椰槳   250ml
車喱茄  10粒 (5粒切半)
菠蘿  100g(切)
泰國圓茄  3粒(切半)
檸檬葉  3片
魚露  1-2茶匙
糖   1湯匙
九層塔  2束
紅辣椒  1隻 (切片)
青辣椒  1隻(切片)

米  2碗份量
黃薑粉 1-1/2湯匙
香茅茸  2茶匙

1. 就像平常煮飯般洗米,加水,在煲飯時加入黃薑粉,香茅茸及一點油拌勻,開掣煲飯。(喜歡有味飯可用雞湯代替水)
2. 鍋內加1湯匙油燒熱,加入雞件煎至兩面微焦 (不用全熟,還會在咖喱內煮),夾起雞件備用。
3. 鍋內應還有剩下的油,放入紅咖喱醬料爆香,炒至嗅到香氣加入椰槳煮滾。再加入雞件,車喱茄,菠蘿,泰國圓茄和檸檬葉。煮至熟透。
4. 加入1茶匙魚露和試味(咖喱本身已有鹹味,要小心不要一次下太多魚露),如不夠味才再添加魚露。最後放入九層塔和紅青辣椒裝飾。
5. 飯煮好,伴以咖喱。Sawadee Kha~~~


Thai Red Curry with Chicken & Turmeric Rice

1/2 Chicken (chopped)
30-35g Red Curry Paste (can be reduced to become less spicy)
250ml Coconut Cream
10 Cherry Tomatos (cut 5 in halves)
100g Pineapple (diced)
3 Thai round eggplants (halved)
3 Kaffir Lime Leaves
1-2tsp Fish Sauce
1tbsp Sugar
Handful of Thai Basil
1 Red Chili  (sliced)
1 Green Chili (sliced)

200g Rice
1-1/2tbsp Turmeric Powder
2tsp Lemongrass (grated)

1. Just like how you used to steam rice in a rice cooker, but adding turmeric powder and lemongrass and a little oil, and stir well just before pressing the "start" button of your rice cooker. (If you would like a bit more of flavor, you can use chicken stock instead of water to steam the rice) 
2. In a pot, add 1 tbsp oil in medium-high heat, add chicken and sear until surface golden. (It does not need to be fully cooked as it will be cooked in the curry later) Take out the chicken and set aside. 
3. In the pot, there should be some oil leftover from the chicken, use that oil to fry the red curry paste until aroma develops. Add coconut cream and bring to a boil.
4. Add chicken, cherry tomatoes, pineapple, eggplant and kaffir leaves. Boil until ingredients fully cooked. 
5. Add 1tsp of fish sauce and 1 tbsp sugar, taste. If it's not salty enough, add more fish sauce. But since the curry is already salty, do not put the fish sauce all at once!
6. Garnish with Thai basil and red and green chili, and serve with the turmeric rice. Sawadee Kha~~~

PLAY - 日本群馬縣 薬師温泉ー旅籠

[薬師温泉ー旅籠] 


由水上駅乘火車往中之条町


接迎專車由車站到旅館約40分鐘。到達正門時,行李不必擔心要拿着走上走落,在入口處店員會逐位點名確認後直接送到lobby,那我們便輕鬆地慢慢explore


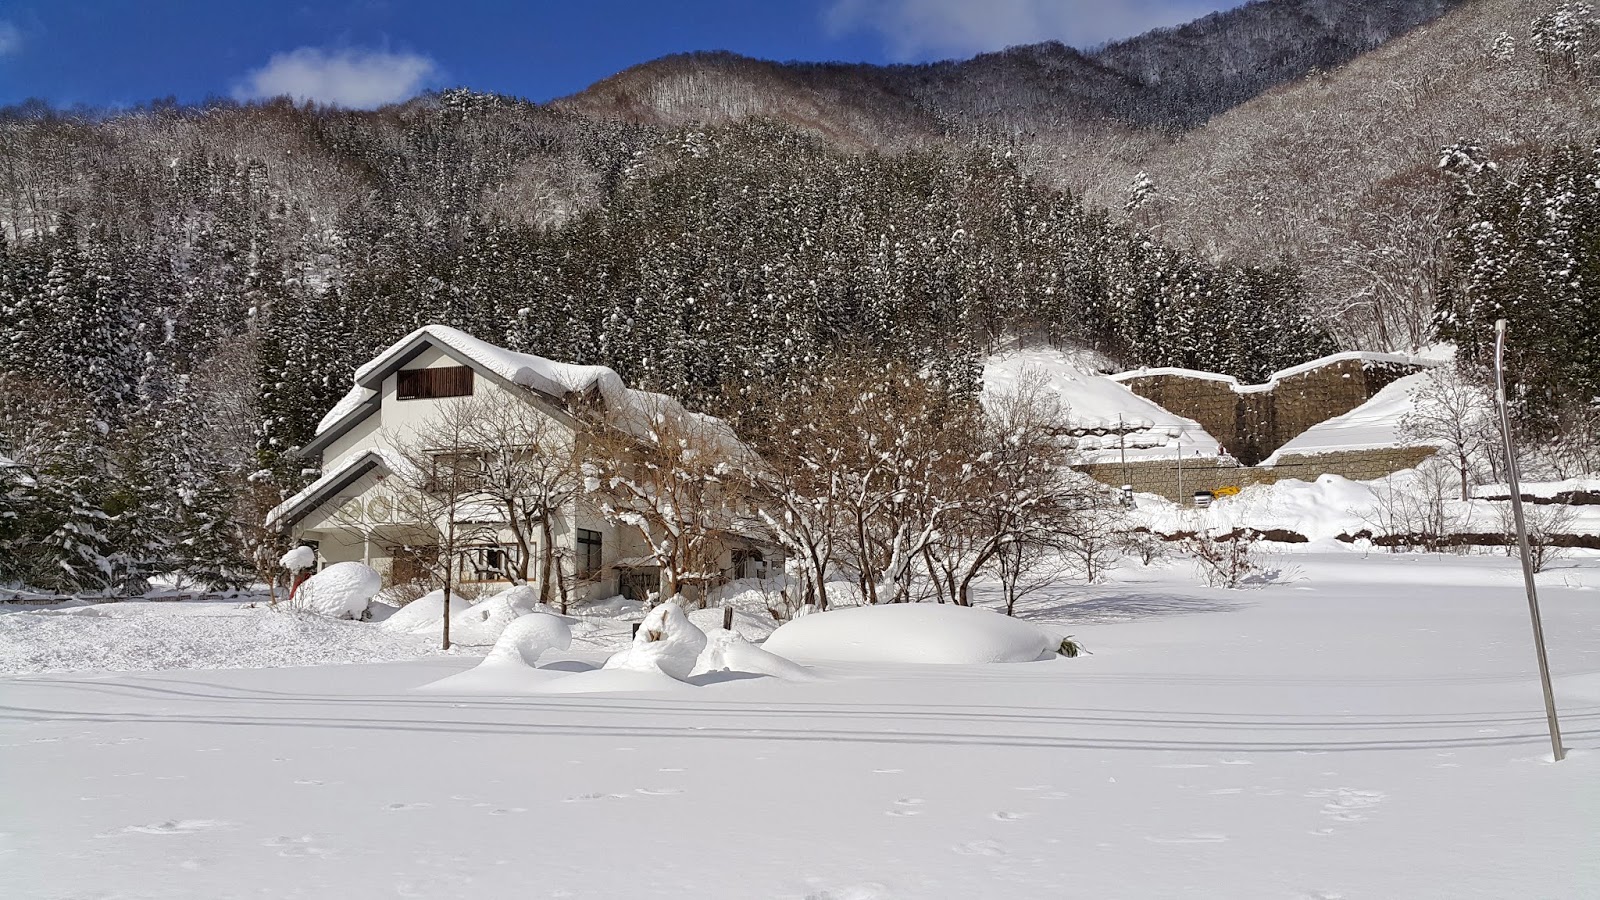
出乎意外地我大愛這間像村落般的旅館。抵步的第一感覺像到了古代的村莊,因這裡由多棟懷古建築組成,有些更是合掌造り(就是白川鄉的那種建築方法) 。


由於午餐也没吃什麽,在入口處有一家吃手作蕎麥麵的,便走進去點了十割天ざる(100%用蕎麥粉做的冷蕎麥加天婦羅)。這裡是自助形式的,就是自己買票給店員,自己找位子座那種,所以没特别期望


誰知麵才放進口內 Oh my god, 太好吃了!真的,是我吃過的top 3內。所以有機會去,絶不要錯過!(小記:由於晩餐也是会席,店員細心的提示别吃太飽...好鍾意這種貼心。)

帶嚼勁和麥香的手作蕎麥麵,10級推薦 
天婦羅也炸得香脆不油膩,野菜新鮮

然後到慢慢走到Lobby,由於外面凍冰冰,Welcome Drink我選了冬菇茶。同時接待員詳細講解設施及晚餐和早餐的用膳時間。館內有2個貸切風呂,如希望租用一般是要付費,但接待員說現在可免費租用,但check out時間便會是10am。若不需要,則可延遲check out時間為11am。這裡大浴場有3個,我就不必刻意租用貸切風呂,寧願遲一點 check out。


到達房間門口時已很impressive, 因為有兩道門,外門是過百年歷史的厚厚大木門,只作裝飾用,內層才是有鎖的。房間超大,面對着河流,房內設有囲炉裏,有古董櫃陳設。但不要以為没現代設備,為保持懷古的雰囲気,電視電話全都隱藏在櫃內。


有多少年沒見過這種電話?

至於薬師温泉,是二百多年前被人發現的天然自噴温泉,泉口距離現在的浴場只有十米,所以必定是天然泉水了。

説到会席料理,訂房時選了比普通高一級的深山の囲炉裏会席(還有幾種更高級的),可能因為這樣得到了一間最大的獨立房吃飯。

食物没有水上温泉那家的精緻,但卻更平實直接地吃到新鮮食材的原味,主菜都是用備長炭燒,愛和牛有上州牛,鷄是赤城鷄。看相片別以為怎麽会席會給人吃鷄翼腸仔,那鷄和腸並非我們平常吃過的一般料子。


吃飽,睡飽,浸飽。第二天 check out 後在館內也有很多地方可以參觀。


最後在乘坐12:40專車前走到山上影一張全景相


再往下一站:草津溫泉...

Sunday, January 18, 2015

COOK - French Toast with Banana and Dried Cranberries 真正法蘭西多士配香蕉和蔓越莓乾

French Toast with Banana and Dried Cranberries 真正法蘭西多士配香蕉和蔓越莓乾


早兩天買了法包 Baguette,是我最愛吃的麵包之一,喜歡它外脆內軟帶點烟韌的口感,有微微的鹹味,新鮮焗好時單獨吃已很美味。做三文治放火腿芝士亦是我最愛的combo。可是吃不完過了兩天便變得乾硬,棄之可惜。轉一轉腦筋,將它做成法式西多士又變成另一道美食。
吸收了蛋槳的法包外殼由乾硬變得烟韌,而內裡則軟熟帶蛋香。不同港式西多士般用白麵包,使麵包吸了蛋槳後變軟,必須用油炸方式才可維持形狀。這個法蘭西多士簡單用平底鍋煎香已可。我用了日本雞蛋和特濃3.6牛奶,味道特別香濃美味,bon appetit!


過氣法包    6-8片 (每片斜切成約3cm厚)
雞蛋   2隻
牛奶   80ml
砂糖  1湯匙
雲喱拿香油  2滴 (沒有亦可省卻)
橄欖油  1湯匙
香蕉  1/2隻切片 (隨個人喜好)
蔓越莓乾/ 提子乾  少許 (隨個人喜好)
糖槳  適量

1. 在一大湯碗打散雞蛋,加入砂糖,牛奶和雲喱拿香油拌勻
2. 放入法包吸收蛋汁
3. 一煎鍋內放橄欖油用中小火燒熱,放入法包慢煎香一面,煎好一面才反轉另一面煎。(注意:不要翻來翻去,因為法包雖硬,吸收蛋汁後變軟,上下表面煎香後會變挺身,但側面有機會因多次翻動而斷裂)。
4. 煎好放上碟,放上香蕉片及蔓越莓乾/ 提子乾 ,再灑上糖槳,起動!

RECIPE

6-8 pieces day-old Baguette (cut diagonally into around 3cm thick pieces)
2 eggs
80 ml milk
1 tbsp sugar
2 drops of vanilla essence
Olive oil
1/2 banana (sliced)
some dried cranberries or raisins
maple syrup

1. In a big bowl, beat the 2 eggs, add milk, sugar and vanilla essence
2. Soak the bread into the egg mixture
3. Heat a pan with the olive oil over medium-low heat, place the baguette pieces and toast one side, then the other until golden brown. (Note: Do not flip too many times, it's best to toast one side until cooked, then flip and toast the other side, as the baguette soaked with the egg will be softened and can be broken easily).
4. Garnish with banana slices and cranberries/raisins and drizzle with maple syrup to serve.

Saturday, January 17, 2015

PLAY - 日本群馬縣 水上温泉 别亭やえ野

[水上温泉]

今次决定去群馬縣。原本是想訂另一間旅館,但被旅遊網對這間的滿分会席料理評價所吸引,所以最後選了住這家别亭やえ野(yaeno)。途中在火車上已開始下雪,所以有輕微誤點,到達水上駅剛好趕到4號乘車站的巴士。

再乘10分鐘巴士直達别亭やえ野門口。


這旅館只有4間獨立客室,各有自家半露天風呂及私人garden。我們被分派到房間はなもも(Hanamomo)


由於下大雪的關係,本來計劃了要到外面的散步道走走也被逼取消。沒關係,反正有自家風呂,在房內好好享受更好。先把身體浸暖,熱呼呼的,也沒特別事可做,花園的雪是剛下的,沒被踐踏過,厚厚又鬆軟,是滾雪人的好時候!回想一下,上一次堆雪人已是在加拿大讀書的時候了,不知會不會成功,好,就試試我的身手!


哈哈,不知不覺玩了一個多鐘,5時已完全天黑了。成功用有限資源堆了Olaf出來!Let it go~~ Let it go~~
Olaf 的衫鈕是房內的Coffee Cream, 手和頭髮是雪堆內找到的樹枝。眼是枯乾的樹葉,鼻是轉乘火車時在便利店買的Pocky! 還有,連接頭和身體是用房內提供的牙刷,誰人今晚沒有牙刷刷牙呢?

期待的夕食到來,説實話,每一道都很精緻,可感到料理人花了很多心思令客人吃到在地食材的同時也吃到他的配搭技巧,吃到尾聲已很飽,但送來的並不是白飯,而是鰻彩飯,美味得驚人,吃了半碗原味,半碗茶漬。


房間舒服,食事満点,唯一美中不足就是接客。
話說由於大雪,旅館接待吃飯前告訴我明天巴士會停止服務,説要預約的士,我説好,結果第二天早上才通知我約不到,也没提供解决方案便算(而附近其他價錢差不多或更便宜旅館都有送迎服務)。
幸好結果巴士當天是有營運的,經過我們的站最接近check out 時間有11:07, 接著是12:16。我們到下一個目的地時間充裕,沒必要趕急,況且昨天大雪也沒機會在附近走走,就打算乘12:15的巴士。店員立刻出現驚訝神色連忙說check out 是11:00  =.=" (當時是10:50,而我們正在用信用卡結帳中...)

昨晚不停下雪,早上的Olaf已只剩下上半身,可是天氣是極好,藍天白雲

走到街上,附近的旅館和居民都忙著清理積雪,馬路已清理好,沒行人的位置卻還積著fluffy的雪。好美啊!


到時間在巴士站等車,日本的交通是很少誤點,但可能由於地面濕滑,行車較慢,遲了10多分鐘。沒問題,回到水上駅仍有時間。

好,往下一站進發!薬師温泉旅籠~

Wednesday, January 14, 2015

COOK - 烤焗蕃茄肉丸螺絲粉 Baked Fusilli with Meat Balls and Tomato Sauce

Baked Fusilli with Meat Balls and Tomato Sauce (English recipe at bottom of page)

超級無敵巨型虎蝦一起煮的是烤焗蕃茄肉丸螺絲粉,這道菜式很適合廚房新手做,因為很多材料用現成的便可以,零失敗。


螺絲粉 200g
蒜頭  2瓣 (切碎)
乾蔥 1粒 (切碎)
車喱茄 10數粒 (切半)
IKEA 急凍肉丸 10粒
茄羅勒意粉醬 300ml
馬蘇里拉芝士(mozzarella cheese) 適量
新鮮羅勒(fresh basil) 1-2塊

1. 用一大鍋煲一鍋滾水,加入2茶匙鹽。水滾加入螺絲粉,根據包裝指示時間煮至嚼勁。約9分鐘,隔水備用。
2. 切好蒜頭,乾蔥車喱茄。
3. 一平底鍋內加入橄欖油1湯匙,燒熱後放入蒜頭和乾蔥,炒至金黃色加入車喱茄和肉丸,蓋上鍋蓋中慢火煮,直至肉丸變軟。
4. 將煮好的螺絲粉加入,再倒入茄羅勒意粉醬拌勻。加入鹽和胡椒調味。
5. 將意粉倒入耐熱容器,表面灑上馬蘇里拉芝士,放入180度焗爐焗約3分鐘至表面微焦取出。
6. 如有新鮮羅勒,切絲灑上表面即成。
*想吃上去有意大利地道感覺,緊記意粉不要煮得太林,這樣才有Al dente 的感覺


RECIPE

200g Fusilli 
2 cloves of Garlic (chopped)
1 Shallot (chopped)
10+ Cherry Tomatoes (halves)
10 Frozen Meatballs
300ml Tomato & Basil Pasta Sauce
Mozzarella Cheese
1-2 leaves of Fresh Basil (Chopped)

1. Boil a big pot of water with 2 tsp of salt. Add Fusilli and cook according to package instruction until al dente. About 9 minutes, drain and set aside.
2. In a frying pan, add 1 tbsp of olive oil, pan fry the garlic and shallot until golden brown. Add cherry tomatoes and meat balls, cover and cook until meat balls are soft over medium-low heat.
3. Add the drained Fusilli and the pasta sauce, still well and season with salt and pepper.
4. Preheat oven to 180C, place pasta in an oven-safe container, sprinkle mozzarella on top and put into the oven for about 3 minutes, or until the cheese are melted and slightly browned.
5. Garnish with chopped basil and serve.

Bon appetit!

COOK - Grilled Tiger Prawns 烤超級無敵巨型虎蝦

[雪櫃有乜就整乜] (English Recipe at the bottom of the page)
今天有點忙,直至晚上6:30才有時間想想晚餐該如何。還是出街食?
算吧,出街又係唔知食乜好。唔覺意揀著難食又貴的餐廳簡直係攞氣嚟受。

打開雪櫃睇睇有乜可用,唔...有車喱茄,有未用完的Tomato Pasta Sauce, 有Shredded Mozzarella。冰格呢?有肉丸同之前買定備用的虎蝦。好,可以做 Baked fusilli with meat balls and tomato sauce (烤焗蕃茄肉丸螺絲粉) 同埋 Grilled Tiger Prawns( 烤超級無敵巨型虎蝦)。用高速準備先!

1. 先用水勁沖d蝦解凍。同時就切蒜頭和乾蔥。
2. 蝦解凍後將鬚和腳剪走。嘩!好大隻呀! 影張相先

3. 然後由蝦頭後面,背脊中間開始將殼剪開,剪至尾部對上一格,留返頭和尾有殼,中間的殼搣走。剪的時候已feel到蝦是在很新鮮的時候高速急凍的,因為蝦頭是緊緊的連著蝦身,然後蝦肉是晶瑩透明有彈性。剪開外殼後已見到背部有很多膏。小心將膏撥開,在下面找出腸挑出。腸都很乾淨,是深海蝦。

4. 先預熱光波爐 (我家沒有焗爐) 至180度(如有Griller更好,可有燒烤的味道)。由於蝦很新鮮,不想用太多調味將蝦的鮮味蓋過,簡單用蒜茸和乾蔥就好了。煎鍋加入橄欖油燒熱,放入蒜茸和乾蔥碎炒香至金黃色。將蒜茸和乾蔥碎放在蝦身,再灑上煙薰海鹽在全支蝦上,再灑一點橄欖油在面,放入爐內焗約20分鐘。

5. 焗好後先取出蝦,焗爐紙上會有點蝦汁,把蝦汁連同1湯匙牛油放入煎鍋煮熱。如有需要可加點鹽調味。將汁淋上蝦面,再灑上鮮磨黑胡椒和新鮮切碎了的意大利芫荽即成。


呢隻虎蝦真係勁,超多膏,肉質爽,蝦味濃。
在ThreeSixty買,一盒6隻(1kg)。包裝沒有牌子,只有ThreeSixty的label寫著急凍虎蝦。原價$498,我買時特價$398。記得以前在九龍城買過比這個更大的要平均$120隻,差不多大的好似$80-$100。所以這盒有特價算幾抵。食過咁正想再買定儲備,但再去到ThreeSixty時已無貨了... 唯有遲d再睇下買唔買到啦。


RECIPE for Grilled Tiger Prawns:

2-3 Cloves Garlic (finely chopped)
2 Shallots (chopped)
3 Tiger Prawns
Extra Virgin Olive Oil
Smoked Sea Salt Flakes
1 tbsp Unsalted Butter
1-2 sprigs Italian Parsley(chopped)

1. Thaw the tiger prawns by placing them under running water.
2. Chop the garlic and shallots
3. Peel and devein the prawns.
4. In a pan, with some olive oil, fry the garlic and shallots until golden brown.
5. Preheat oven to 180C, place fried garlic and shallots on top of the prawns, season with salt and sprinkle with some olive oil. 
6. Bake for around 20 minutes. Take out the prawns, there will be some juice on the baking sheet, pour them into a frying pan, add 1 tbsp of butter and cook until hot, season if needed. Pour sauce over prawns and garnish with fresh black pepper and chopped parsley to serve.

Tuesday, January 13, 2015

EAT - 日本東京 アメ横 隨意在街上吃便宜魚生飯

還未到時間乘火車向溫泉之旅進發,先在上野アメ横走走。アメ横就在上野公園對面,專賣便宜東西和食物。就像街市一樣,人車混雜

然後就走到UNIQLO,在地下看到到處都有吉池海產的指示牌,就八卦走去看看。Oh...是魚市場,好!就看看格價情報。好多人在選購,員工都忙碌地執貨,廚房在忙著劏下新鮮魚生

什麼??? 那一大條TORO才1000yen, 有無搞錯,平到咁?香港吃才一塊的價錢!
太憤怒了!又不能買來帶回港,只有看的份兒 -.-"
算!走回アメ横,剛才好像有看到便宜的魚生飯店子


找到了,各式各樣選擇才 550-1000yen。選了明太子Maguro 丼 和 中Toro丼,各700yen。
這麼便宜就當然是坐在街邊吃的啦,自助型式,跟店員點好要什麼,會給你號碼牌。自己找位子坐,附近有沖茶的水機,就self serve喇。叫號碼就舉手送飯來,自己添加醬油,起動!


這個價錢你不要講求米芝蓮質素,但魚是十分新鮮的,最重要是體驗當地一般人的生活,大家吃個快晏不是茶餐廳,是街邊魚生飯。快、靚、正,又飽肚又健康。