Meals on a Loveseat

Meals on a Loveseat
最新食譜「美味在一起」現已於各大書店及amazon.com有售 "Meals on a Loveseat" is on sale at HK bookstores and at amazon.com now

Pages

Monday, June 29, 2015

COOK - 墨西哥小辣椒蜜糖鷄翼 Mexican Honey Garlic Chicken Wings with Jalapeño

有一家墨西哥餐廳我是十分喜歡去的,其中的雞翼是我必點菜式,因為好食到每次都要爭食!

可能是因為我在加拿大長大,墨西哥菜在那邊相當流行。但香港真的不算多,好吃的更少。ご主人本來就不喜歡吃那些皮包著什麼的菜,所以對Taco, Burrito, Quesadilla那些東西完全沒興趣,唯獨是這個雞翼必定會搶著吃!

可是那個雞翼其實是炸的。我很怕開油鑊,一來麻煩,二來油不能完全翻用太多次,在家炸東西實在不太cost efficient. 但買了Airfryer後,感覺做雞的菜式很理想,效果也很好,所以今次又憑著味覺記憶把那個墨西哥雞翼自己做一次出來,真的是超好味,ご主人說比那餐廳的更好味。既然是這樣,我也不得不花時間寫食譜跟大家一齊分享一下!


墨西哥小辣椒蜜糖鷄翼 (12隻 ~ 2人份)

鷄翼 12隻
海鹽  適量
紅椒粉(Paprika) 適量 (optional**)
橄欖油 2湯匙
生粉  適量
墨西哥小辣椒(Pickled Jalapeño) 10片 (optional**)
蒜頭  4-5瓣 (切碎)
麥芽糖  6湯匙 (其實很難量度的,就用筷子卷起1/3 盒左右)
辣椒油  1茶匙 (optional**)
芫荽 1支(只用葉,切碎)

1. 將雞翼用鹽,紅椒粉及橄欖油醃好,放入雪櫃醃2小時。
2. AF預熱190ºC 5分鐘,grill盤搽油。
3. 將雞翼表面撲上生粉,放入grill pan 內。190ºC 7分鐘
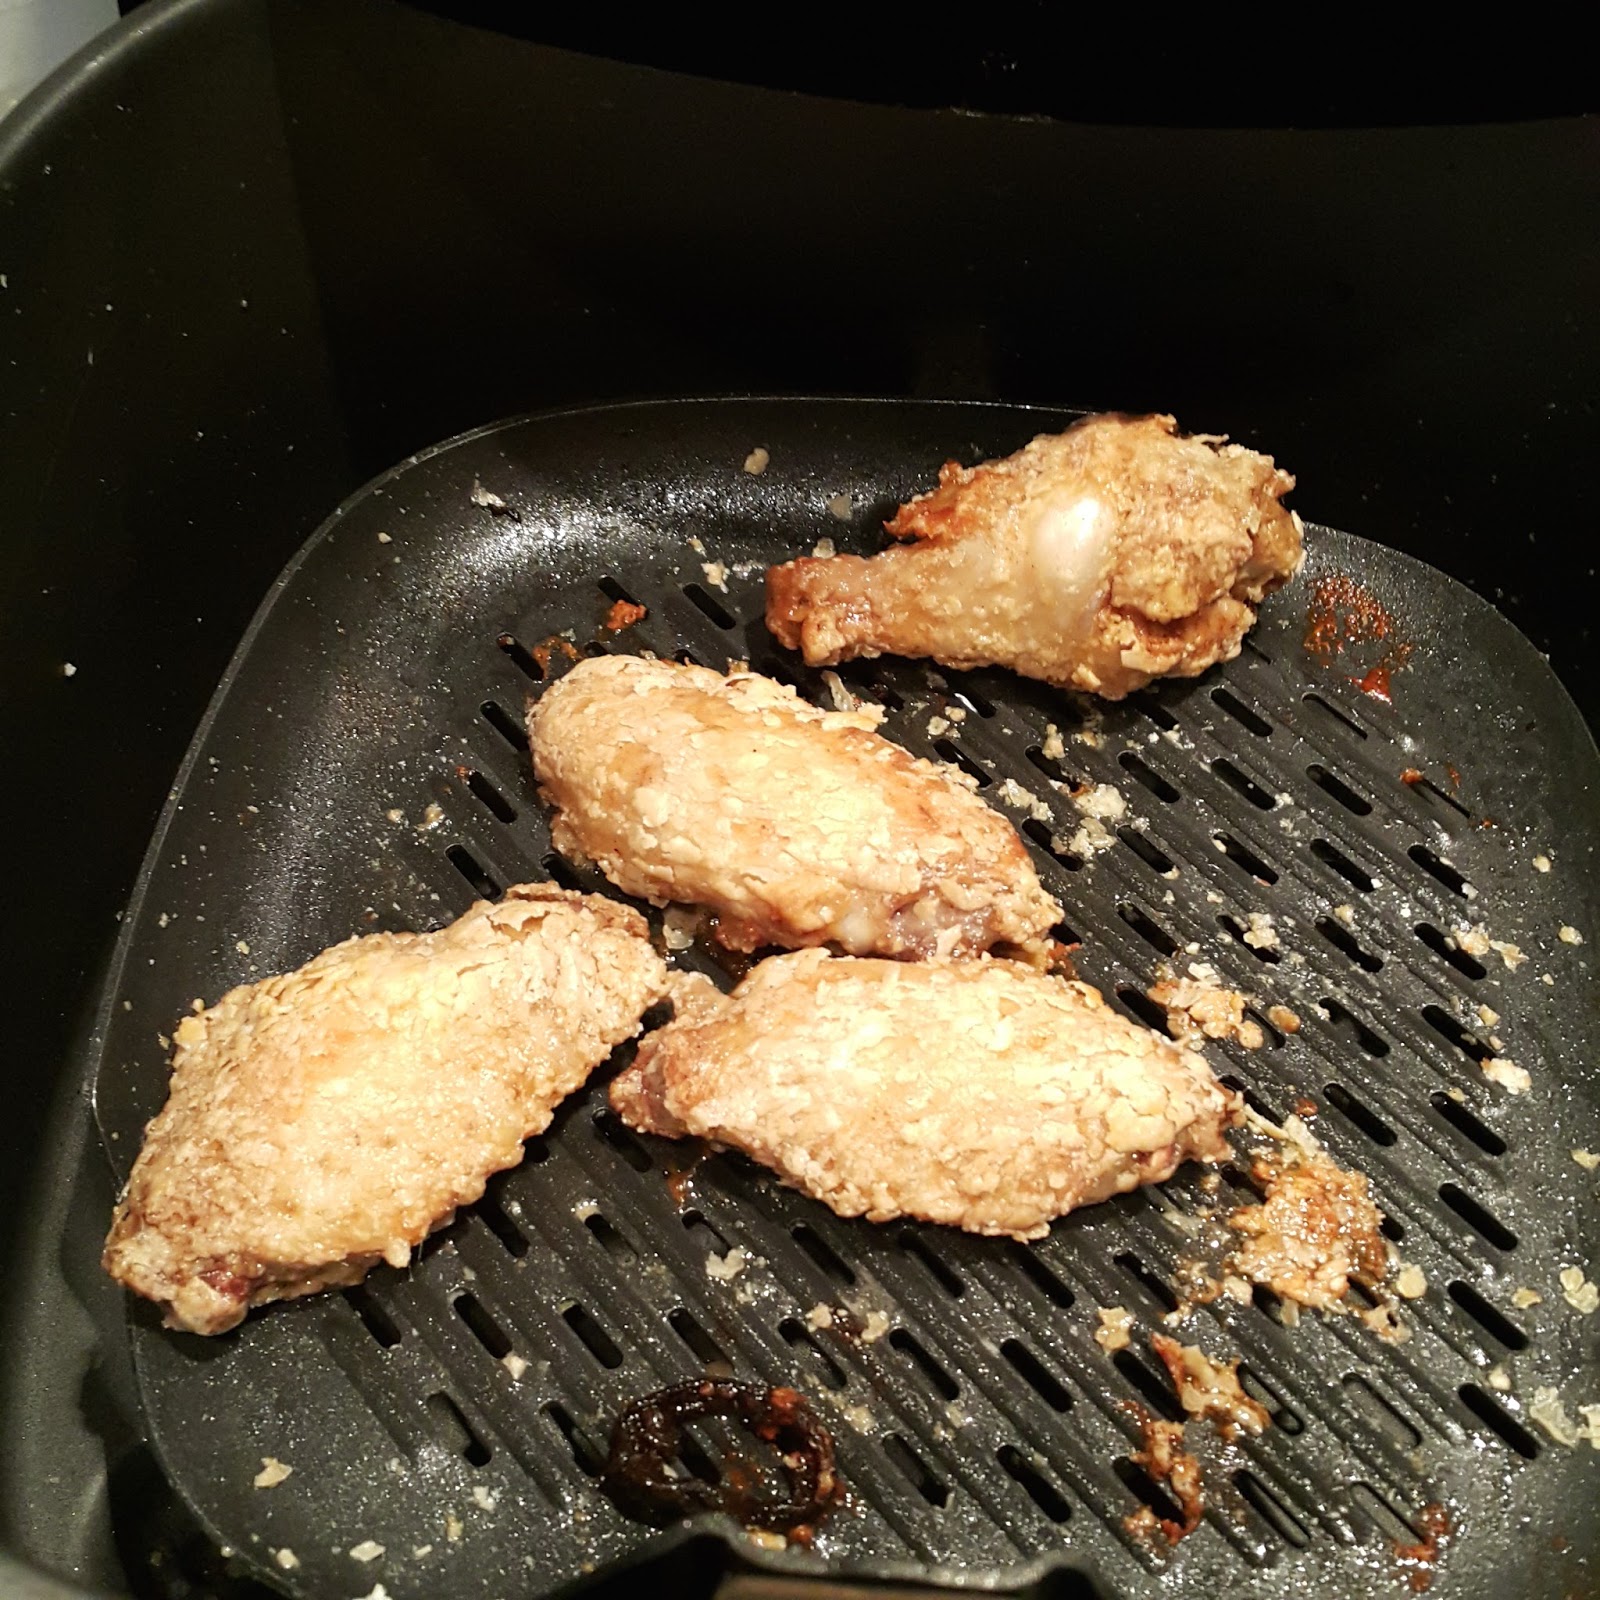
4. 打開AF, 放入墨西哥小辣椒同烤。190ºC 5分鐘
5. 此時用平底鍋加橄欖油燒熱,放入蒜茸爆炒至金黃脆粒,加入辣椒油和麥芽糖煮熱。當麥芽糖溶化時,將AF內的雞翼及墨西哥小辣椒倒入,拌勻令汁包顆著雞翼表面。
6. 上碟,灑上芫荽,趁熱食喇!Amigo!!
**不吃辣的可將材料內Optional的項目拿走便可


Mexican Honey Garlic Chicken Wings with Jalapeño (Serves 2, 12 pcs)

12 Chicken Wings/Drummets
Sea Salt
Paprika (optional)
2 tbsp Olive Oil 
Corn Starch
10 slices Pickled Jalapeño (optional)
4-5 cloves Garlic (finely chopped)
6tbsp Maltose (It's very sticky and becomes very hard to measure, just roll 1/3 of a box with a chopstick)
1tsp Chili Oil (optional)
Coriander (leaves only, chopped)

1. Marinate the wings with salt, paprika and olive oil, cover and place in the fridge for 2 hours. 
2. Preheat Airfryer to 190ºC 5 mins, oil the grill pan。
3. Pat corn starch on the surface of the wings, just a thin layer will do. Place into the grill pan and cook at 190ºC for 7 minutes
4. Open the Airfryer, place jalapeño and continue cooking at 190ºC for 5 minutes
5. Meanwhile, use a skillet or a frying pan to heat some olive oil, add garlic and cook until they are dry and crispy. Then add chili oil and maltose. Once the maltose started to melt, add the cooked wing and jalapeño in it and stir well until the sauce covers the wings. 
6. Serve on a plate, garnish with coriander. "Vamos a comer a mi amigo"!!


Step 3 


After cooking for 7+5mins at 190ºC


Saturday, June 27, 2015

EAT - 台北壽司 Omakase 一味屋/乙味屋

上次寫過在日本東京的壽司Omakase體驗後,很多朋友很有興趣,更有朋友立即動身去了吃。想看回此文請按這裡

這次近一點,位於台北。是 ご主人之前出差去過的店,他大力推薦我去試一試。剛好這次女子旅一齊去台北,便有機會去試試這家位於台北延吉街的一味屋了!


我們女子旅一行五人。早在兩星期前就託台灣朋友幫我訂檯,但忘了跟她說要坐counter,一星期後再打去改為坐counter,店員回應說: 

1. 坐counter minimum charge 每人NT$2000 
2. 5人一起坐counter沒法談天
我說沒問題,這班女人只顧吃的。

我要坐counter當然自有原因。因為店內主壽司師傅(有時同時是老闆) 多數就站在counter後,有什麼好料,第一時間就能遞給你,會日文的話更有jetso。我就試過坐counter時因為懂得用正宗手法吃壽司,師傅對我另眼相看,暗裏送我一件罕有部位超美味壽司。只須坐著跟他閒談,他愉快你便吃到好料。總之吃Omakase就是吃到飽,好料全給你。


當天下著雨,人生路不熟,偏偏台灣朋友不停送來短訊催促我準時到達,因店員已打過電話給她一再確認,怕我們的位置會讓給別的顧客。有點緊張的狀況下,終於準時到達。

進入店內我反而一點也不impress,感覺像是香港舊式的日本料理店,有一點陳舊,心裏暗暗埋怨主人為何會推薦我來。但店員很親切慇勤,快速帶我們入座。當他們聽到我們並不是說國語,登時問我是如何知道他們的店,我說是我丈夫來過介紹給我的,壽司counter後的老闆立刻打趣說,人在外便不要說已婚,不要錯失機會嘛!大家一下子感覺混熟起來,氣氛良好。

然後店員便過來問我希望要怎麼吃。我便問不是吃Omakase, NT2000以上的嗎?噢!可能是他想說得婉轉一點,我的率直令他有點面紅。他解釋說是NT2000以上,再因應價錢調整食材,例如NT2500或NT3000上下,我給他budget便可。原來如此,我們一眾女子,也不算大食 (最大食的應該是我),就定在NT2500上下吧。這樣很好,不必擔心最後會收到令人意外的帳單,可以盡情enjoy美食了!

先來冷頭菜3味。由左至右吃,分別是麻醬豆腐,小青瓜和煙燻骨膠原。不錯,但不足夠消除我對店內裝潢的疑慮。


接下來是刺身,有鯛魚( たい)、しまじ (中文好像是鰝)和輕燒鰈魚(さめかれ)。還有牡丹蝦(ボタンエビ) 和薑片清清口迎接接下來的美食。相當不錯,魚很新鮮,況且十分欣賞食物懂得由淡味的白身魚先上。輕燒鰈魚表面帶油光,但入口清爽。牡丹蝦不算大,但鮮甜爽口。薑片雖然只是過場的客串,但是驚人地好吃,酸甜度剛好,而且能切得這麼薄,實在刀法如神。腦內開始對這店改觀。
鯛魚( たい) Tai
鰝(しまじ) Shimaji
輕燒鰈魚(さめかれの炙り) Samekare
牡丹蝦(ボタンエビ) Botan-ebi
出奇地好吃的薑片

清清喉嚨後便迎接壽司出場。炙燒比目魚邊(ひらめのえんがわあぶり)、海膽壽司(うに)和中拖羅(ちゅうとろ)。跟在日本高級壽司店吃的一樣,放上碟前已下醬油,不必自行再加。炙燒比目魚邊極度肥美,咬下口內油脂満喫。我們吃得高高興興,反而同行友人不喜魚油,吃下打了個冷顫,我不理她,早說給我吃好了,不識欣賞!海膽是幾瓣小小的疊在一起,看色澤也新鮮,只是我吃過北海道的馬糞海膽才比下去。整餐最驚為天人亦另我最難忘的終於出場了!表面看來是一般的中拖羅,放入口內才知道玄機,拖羅是軟滑無筋,在製作壽司前是經過煙燻的,再加上幾小瓣的菊花瓣,在口內先是煙燻香氣配軟滑口感再有清新的菊花中和。吃過這一塊後,我便確認不枉此行,實在太美妙了!
炙燒比目魚邊(ひらめのえんがわあぶり)hirame-no-engawa aburi
海膽壽司(うに) uni
中拖羅(ちゅうとろ) Chu-toro
當我還在陶醉於剛才的美妙時,已送上燒物。先是剛才吃過的牡丹蝦頭,放入了米飯再鹽燒,飯粒吸收了蝦膏,香!再來一碟三味炸物,一件是兩片紫蘇夾著帶子和蝦膠,很特別。炸九肚魚,有點過鹹。紫菜包本菇,正常。


口內還存有油膩感,即時便送上一片超甜粟米,真是超超超甜的!

師傅放了一些鮮炸的牛蒡在我碟上,切得很薄,帶一點點甜味。我再問詳情,老闆立刻推出他的得力助手,說是由他一手一腳做的。強調那牛蒡不是用刨的,是用刀切成一樣厚度的薄片再炸,以糖及紫菜碎調味。

看到這裡差不多飽了吧。。。
不要停!食物又來了!!
這一份是汁煮帶子和魚塊,帶子煮得剛好,內裏還是微暖但半生的。醬汁是帶點甜味,伴洋蔥吃比較好。

該差不多上甜點了吧!什麼??? 還有每人一條燒魚? 真的,每人一條手臂般長的燒魚,雖然很飽,但端上桌上的魚實在燒得很好,皮脆肉嫩,魚肉鮮味又滑得很。問問老闆這是什麼魚,這麼好吃,原來是台灣才有的,在宜蘭龜山島釣來的「紅喉」。只須點一點點岩鹽便很好吃,尤其是背上魚鰭的邊位,輕輕吸啜出滑滑的魚油和魚肉。

在撐到不行的時候端來了用高溫燒熱的清湯,沖入燒香了的魚骨內,令魚的香氣和蛋白質衝出來的一個熱湯。飯後喝碗熱湯的確令胃部舒泰很多,但同時也變得更飽。

終於看到終點了,先是清甜的菠蘿,再有練奶燒鮮草(沒有龜的龜苓膏) 

不知不覺下,一共吃了十多道菜,時間則過了2個半小時。整個晚餐過程雖然我們五人是排排坐,但並沒冷場,因師傅不停跟我們談天,然後鄰座的客人也一起說話,整間餐廳哇啦哇啦的好不熱鬧,當鄰座客人得知我們其中一人當天是壽星女,即豪爽地請了她喝一杯荔枝白酒。無論店員和客人都打成一片。

埋單的時候,並沒有奇怪的附加費用,食物連飲品平均每人NT2760,折合港幣約7百多元。說不上十分便宜,但單以食物質素來說又相當合理,起碼在香港付這個價錢是一定吃不到這種質素的。去台北除了麻辣鍋夜市外,想吃高質又價錢合理日本菜,可來試試。

一味屋(地圖寫乙味屋)
地址:台北市延吉街160巷2號
營業時間:1730-0100 (週一公休)
電話:02-2711-9922
http://www.takeit.com.tw/shop.php?action=info&id=31


Monday, June 22, 2015

COOK - 自家製青醬及蝦仁青醬意粉 Home made Pesto Sauce with Pasta

比起Cream Sauce, 我更愛Pesto,沒有那麼膩,吃起來清新的香草香隱隱帶著果仁的香氣。
試過偷懶買現成的,的確方便,但herbs的香味一點也不突出,還是不要太懶,動手自己做的好吃。一次做一大瓶放入雪櫃,只要橄欖油蓋過香草,瓶蓋封好,可以放整個月慢慢吃。

今次用了這個青醬來做意粉,但用來做Pizza或者Bread Spread 都好好味!在我的書 "Meals on a Loveseat 美味在一起" 內有教做一個Green Pizza,就是棄茄汁而用這個Pesto來做一個全綠色的Pizza,好好味啊!


Pesto Sauce 自家製青醬

青醬材料:
羅勒葉 600g (切碎)
意大利芫荽 400g (切碎)
松子 150g
鮮巴馬臣芝士 150g (刨碎)
蒜頭 6瓣 (去皮)
特純橄欖油 600ml

1. 將所有材料準備好,放入攪拌機內打碎變成微杰的漿狀便成。
2. 在吃的時候,只拿需要的份量才加鹽調味。如要留起,放入清潔的瓶子內,加入足夠的特純橄欖油蓋過香草,放入雪櫃。


Pesto Sauce:
600g Basil (roughly chopped)
400g Italian Parsley (roughly chopped)
150g Pine Nuts 
150g Fresh Parmesan (shaved)
6 cloves Garlic (peeled)
600ml Extra Virgin Olive Oil

1. Put all the ingredients in a blender and blend until it becomes a liquid paste. 
2. Take only the portion you need and season with salt just before serving. If you want to save it for later use, keep in an air tight container, pour sufficient extra virgin olive oil to cover the surface of the herbs, then place in the fridge.


Pesto Pasta with Shrimp 蝦仁青醬意粉


蝦仁青醬意粉 (2人份)

蝦仁 12隻
意粉 180-200g
青醬 120g
松子 少許 (裝飾用)
鮮巴馬臣芝士 (刨片裝飾用)
蘿蔔苗 少許 (裝飾用)

1. 煲一大煲滾水,放入蝦仁灼熟隔水剩起備用。將意粉放入水內,跟據包裝指示減2分鐘煮熟意粉 (例:包裝指示須煮9分鐘,則7分鐘隔水拿起)
2. 在一煎鍋內放入適量橄欖油,煎香已熟的蝦仁,加入青醬,放入意粉,將鍋內材料完全混合煮2分鐘至意粉嚼勁。加入鹽及鮮磨黑胡椒調味。
3. 上碟後灑上烘過的松子,鮮巴馬臣芝士刨片及飾上蘿蔔苗即成。


Home made Pesto Pasta with Shrimp (Serves 2)

12 Shrimps (peeled)
180-200g Pasta
120g Pesto Sauce
Pine Nuts (for garnish)
Fresh Parmesan (Shaved for garnish)
Turnip Sprouts (for garnish)

1. Boil a big pot of water, cook the shrimp until pink, drain and set aside. Using the same pot of water, cook the pasta according to package instruction minus 2 minutes. (e.g. If package advise you to cook for 9 minutes, you cook for 7 minutes and drain.) 
2. In a pan, put olive oil and pan fry the shrimp until golden, add pesto and pasta, mix them well and cook for 2 minutes or until the pasta is al dente. Season with salt and pepper.
3. Serve on a plate, and garnish with toasted pine nuts, freshly shaved Parmesan and some turnip sprouts. Have a Happy Green Day! 


另外,這就是我上面提到的Green Pizza,在我的書內有食譜啊!


Wednesday, June 17, 2015

EAT - 台灣洪端珍三文治

香港人會一箱箱買回家的洪端珍三文治,真有這麽好吃嗎?老實説,我不懂得欣賞。

買了招牌和火腿麥包,料是薄到我吃不到味道,只吃到很膩的牛油和超甜的美乃滋。

進入店內買的時候,只聞到一陣酸臭味。。只可説人一世物一世,什麽也試試吧,但我應該以後也不會買來吃。

Tuesday, June 9, 2015

COOK - 菠菜芝士鬆餅 Spinach and Cheese Muffins

我以為個個都淨係鍾意食甜muffin,淨係得我一個鍾意食鹹嘅添!
點知整咗個Spinach and Cheese Muffin出嚟,原來都好多人鍾意㗎喎。。。

呢個Muffin真係簡易到極,唔駛打蛋器或Mixer,就咁用手攪就得,放入Airfryer 15分鐘就掂,勁快有得食。


材料:(可做3個底部直徑7cm的鬆餅)
高筋粉 40g 
低筋粉 40g  
泡打粉 4g
蘇打粉 1g
鹽 1/2 茶匙
無鹽牛油 35g (已溶)
蛋 1隻
牛奶 100ml
急凍雪藏切件菠菜 30g (解凍,搾去多餘水份)
車打芝士或軟芝士碎 45g 

1. 將高筋粉,低筋粉,泡打粉,蘇打粉及鹽放入一碗內混合好。
2. 在另一大碗內,打入蛋,打散。加入牛奶,已解凍菠菜,芝士碎和牛油拌勻。
3. 慢慢將步驟1的粉加入步驟2內,攪拌至粉類融入,變成糊狀。
4. 預熱Airfryer 180ºC 3分鐘。
5. 將糊用湯匙放入鬆餅杯內至8成滿。
6. 放入Airfryer 175ºC 15分鐘,叮叮聲就打開有得食喇!
* 如果用焗爐的話,約175ºC 30分鐘,用牙籤插入無黏著便熟了。


Spinach and Cheese Muffins (Makes 3 with a diameter of 7cm)

40g Bread Flour 
40g Cake Flour  
4g Baking Powder 
1g Baking Soda 
1/2 tsp Salt
35g unsalted butter (melted)
1 egg
100ml milk
30g Frozen Chopped Spinach (defrosted, drain any excess liquid)
45g Shredded Cheddar Cheese or any kind of soft cheese

1. In a bowl, mix bread flour, cake flour, baking powder, baking soda and salt. 
2. In another big bowl, beat the egg, add milk, spinach, cheese and butter, and mix well.
3. Slowly add the flour mixture from Step 1 to the mixture in Step 2. Stir until the mixture becomes a batter. 
4. Preheat Airfryer 180ºC for 3 minutes
5. Fill the muffin cups with the batter until 80% full. 
6. Place the muffins in the Airfryer and cook at 175ºC for 15 minutes. 
7. Serve with juice, tea or coffee as you like it. 
* If baking using a conventional oven, try 175ºC for 30 minutes, insert a toothpick into the center and if it comes out clean, it's ready! 


Thursday, May 28, 2015

COOK - 德國鹹豬手配蘋果酸菜 Pork Knuckle with Apple Sauerkraut

投資了Airfryer,當然要用盡佢,用到回本為止。Airfryer 其一大好處就是可短時間高温烹調食物,做脆皮鹹豬手就又快又乾手淨腳。

鹹豬手的正名是Schweinshaxe(讀:薯fi時黑時),其實唔係真係手,係手臂或者大脾就真。通常都配酸菜食,因為隻手太膩,要食啲酸野中和返。另外都會加薯菜食,咁就均衡地有肉有菜有澱粉質了。醬汁方面,會點芥辣或horseradish。

其實這個鹹豬手食譜記得好似係在東週看到,然後記在腦內,到現在買到Airfryer先將它實行。我的記憶可能跟原著有出入,但我就是用以下方法做都成功。


鹹豬手材料:
胡椒粒 2湯匙
月桂葉 4片
水 一大煲(可蓋過豬手)
白醋 3湯匙
急凍鹹豬手 1隻(先解凍)
黑啤 1-2罐
百里香 4支

1. 於一大煲內放入胡椒粒,月桂葉和水煲滾。將預先解凍好的鹹豬手放入,等水再次滾至沸騰後熄火。加入白醋拌勻,蓋上鍋蓋靜置6-9小時。(浸後的豬皮會變淺色,然後油脂會留在水內。)
2. 拿起豬手,將它浸入黑啤內,與此同時用义在豬皮上插很多洞(就想像它是你的仇人狂插就是!!!)讓它在黑啤內浸泡半小時。留起黑啤。
3. 讓豬手在雪櫃內風乾數小時。(不需蓋保鮮紙,直接垂直放入雪櫃內抽走濕氣)
4. 預熱Airfryer 200ºC 3分鐘。這時拿起豬手,在表面加上百里香的葉。
5. 將豬手放入Airfryer,200ºC 15分鐘,中途打開在表皮塗一點黑啤。15分鐘後反轉再塗黑啤,再次 200ºC 焗15分鐘。拿出來豬手應該會呈金啡色,脆卜卜!(豬手的大小不同,時間上可能需作出調教。)

** 如果沒有Airfryer,用焗爐都一樣做到,同樣是200ºC上下火,將豬手垂直放,大約焗45分鐘左右吧,只要皮變成金黃色便可。


酸菜:
酸菜是由椰菜切幼絲再加入鹽, 放入容器內自行發酵的產物,由於椰菜發酵所以會變酸,含有益的天然益新菌,可幫助腸道蠕動 (你明我講乜啦!) 其實做這個酸菜的原理和大家熟識的韓國Kimchi是一樣,只是醃料上Kimchi加了辣椒。


這次是用罐頭的,另外再自行加入蘋果絲一齊煮至變軟後上碟。
其實只吃一餐便不必大費周張自己整,罐頭的只是十幾蚊。但如果你很喜歡吃,也希望吃到天然一點的便可自己做。我在N年前做過一次,因有谷友提出想知道方法,便在這裏寫一次。

椰菜 1個 (~1kg)
鹽 1.5湯匙
大闊口玻璃瓶 (~2L或更大)
石春 5-10粒
蒸布 1塊
橡筋 1條

1. 椰菜去梗,留下兩塊大葉,其他切成幼絲,放入一大碗內。加入鹽,用手將鹽massage入椰菜內,約10分鐘後椰菜便會出水。
2. 隔掉水份將椰菜絲放入玻璃瓶內,盡量壓實在底。在椰菜絲最頂部放上大椰菜葉,一塊向下蓋著椰菜絲,一塊向上。然後放入石春壓在椰菜面,務求令椰菜絲不要彈起一直壓實在底部。
3. 在瓶口蓋上蒸布並用橡筋緊繫著瓶口。放置在12-18ºC的陰暗乾燥環境內發酵約3天至10天。在頭一天,每隔幾小時可攪動一下椰菜直至見到液體蓋過椰菜表面。3天後可試味是否你喜歡的味道,若喜歡酸一點可再發酵久一點。
4. 當發酵至你喜歡的程度,便可拿去蒸布,蓋上蓋放在雪櫃內,隨時拿出來吃。


薯條:
很有趣,有谷友對我的薯條更有興趣。既然用得Airfryer,當然就要用它來整它的最大賣點:薯條!我試過用新鮮薯仔切條浸水再混油放入Airfryer炸和用急凍薯條炸,覺得急凍的在Airfryer效果好一點。做這個鹹豬手的配菜時,只要在第二轉烤豬手的15分鐘一同放入薯條便行,中途搖一下籃,薯條和豬手便可同時出爐。


Pork Knuckle with Apple Sauerkraut

2 tbsp Peppercorn
4 pcs Bay Leaves
Big pot of water enough to cover the Pork Knuckle
3 tbsp Vinegar
1 Frozen Pork Knucle (thawed)
1-2 Cans Black Beer (Dark Lager Beer)
4 sprigs of Thyme

1. Put peppercorn and bay leaves to a big pot of boiling water. Add pork knuckle and wait until it comes to a boil again, add vinegar and turn off the heat. Cover and let sit for 6-9 hours. 
2. Drain the pork knuckle, soak it in the black beer. Meanwhile, use a fork to poke the pork skin and let it soak in the black beer for half an hour. Retain the black beer.
3. Air dry the pork knuckle in the fridge for a few hours.
4. Preheat Airfryer to 200ºC for 3 minutes. Spread thyme leaves on the surface of the pork. 
5. Put the pork knuckle in the Airfryer at 200ºC for 15 minutes, open the rack midway and brush black beer on the surface. Then flip the pork knuckle and brush the other side with black beer again, cook at 200ºC for another 15 minutes. When it's done, the skin should be nice and brown and crispy. (Cooking time varies depending on the size of the pork knuckle, please make the required adjustment). 

** If you do not have an Airfryer, the pork knuckle can be roasted in an oven. Place the pork knuckle in a baking sheet vertically, use top and bottom heat at 200ºC and cook for about 45 minutes or until skin is browned.


Tuesday, May 19, 2015

COOK - 用Airfryer做抹茶雪芳蛋糕 Green Tea Chiffon Cake

因為我家無焗爐,又無位放,又唔太食甜嘢,所以好少整蛋糕。
買咗新玩具Airfryer就要試吓整唔同種類嘅嘢試吓佢嘅function。
在櫃頂唔覺意揾到一個Chiffon Cake 模,於是就冒住失敗嘅危險,勇往直前整一個放入AF焗!
點知竟然成功地利用AF整到一個成型又幾軟熟嘅抹茶雪芳蛋糕出嚟喎。

By the way, 我的AF是大size,整到5吋模,唔肯定細size放唔放得到,不過我放入去時仲有好多位,應該OK的。(剛收到朋友反映鐵模透氣位高得滯入唔到AF,我用的是紙模,可在$12店或ccsuper買到)

就在今日,就在此地,同大家分享一下!


Airfryer 抹茶雪芳蛋糕 (5吋雪芳蛋糕模)

低筋粉 75g 
抹茶粉 12g 
蛋白 3隻
糖 80g (少甜放60g)
蛋黃 3隻
菜油 40ml
水 60ml

1. 低筋粉和抹茶粉拌勻,過篩 。
2. 蛋白放入碗內,用電動打蛋器打至起泡變白色。分3次加入糖繼續打至蛋白企身。
3. 另備一個碗放入蛋黃,菜油和水,輕輕發至混和。將步驟1的材料逐步加入,用打蛋器打至變成沒有結粒的黏黏粉漿。
4. 將步驟2的蛋白分次卷入粉漿中,輕輕的混合至見不到有蛋白泡泡。
5. 預熱AF至170ºC*,3分鐘。
6. 將粉漿倒入雪芳蛋糕模內,約8成滿。放入AF*,170ºC 20分鐘,後轉160ºC 8分鐘。用牙籤插入蛋糕,沒粉漿黏著便熟了。
7. 將蛋糕倒扣放涼。脫模。
8. 切件配合日式紅豆和忌廉同吃。

(*如用焗爐,可用180ºC焗30分鐘。再次重申,因不同焗爐大小或型號會有溫差,請自行調教。)

Have a Green-tea Day! 


Green Tea Chiffon Cake

75g Cake Flour
12g Matcha Powder
3 Egg Whites
80g Sugar (use 60g for a less sweet version)
3 Egg Yolks
40ml Vegetable Oil
60ml Water

1. Mix cake flour with matcha powder and sift through.
2. Put egg whites in a clean bowl and whip with a egg beater until foams develop, add 1/3 sugar at a time while whipping until stiff peaks form.
3. In a separate bowl, beat egg yolks with vegetable oil and water. Add the matcha cake flour mix in Step 1 and beat until the mixture becomes glutinous with no lumps.
4. Add the whipped egg whites from Step 2 into the cake mix in a few batches, carefully fold the egg whites in without over mixing.
5. Preheat AF to 170ºC*
6. Pour the mixture into a chiffon cake mold until 80% full and bake for 20minutes at 170ºC, then 8 minutes at 160ºC. Insert a toothpick into the cake, if no residue is clinging onto the toothpick, the cake is cooked.
7. Turn it upside down and let cool. Remove the mold.
8. Serve with Fresh Cream and Azuki Red Beans.


(* If using a conventional oven, preheat to 180ºC and bake for 30 minutes. Since the temperature varies among different sizes and brand of ovens, please do make the appropriate adjustment)

Have a Green-tea Day! 


Monday, May 18, 2015

COOK - 薩摩芋(日本蕃薯)布甸 Japanese Sweet Potato Pudding

在超市看到一袋袋的薩摩芋(日本蕃薯),不禁令我想起在鹿児島居住的日子。
鹿児島最旺的一條街叫天文館通,街上中下段都有賣不同薩摩芋的副產品,有最著名嘅蕃薯撻,蕃薯乾,蕃薯和菓子,mochi之至 KitKat都有蕃薯味嘅。九州嘅蕃薯係日本最出名,最甜,所以大家都唔怕放屁,人人食蕃薯,連日本酒Sake都有用蕃薯釀製。

雖然蕃薯並非我所愛,但係企咗喺超市個蔬菜櫃,望住堆蕃薯,一堆回憶湧出,決定買一包返屋企。

蕃薯除咗燴之外仲可以點食呢?
適逢媽媽生日,我決定整一個小甜點俾佢:薩摩芋(日本蕃薯)布甸

呢個布甸做出來表面先是輕輕的,有點泡泡似梳乎里,入面滑滑布甸會食到少少蕃薯粒。我不嗜甜,做咗減甜,媽媽覺得啱啱好。


薩摩芋(日本蕃薯)布甸 (4人份 - Le Creuset Large Ramekins 4個) 

魚膠粉 5g
熱水 3湯匙
日本蕃薯 100g (去皮切小粒)
牛奶 300ml
忌廉 90ml
糖 50g (已少甜,喜歡甜的可加至60g)
已打起至70% soft peak的忌廉 20g
日本蕃薯薄片 4-8片裝飾用  (不用去皮)
糖 2茶匙
水 100ml

1. 將魚膠粉溶於熱水中,備用。

2. 在一個小鍋內放入已切小粒的日本蕃薯,牛奶,忌廉和糖,用小火煮至日本蕃薯變軟身,約20分鐘。

3. 倒入步驟1的魚膠粉溶液,拌勻關火。

4. 將蕃薯牛奶溶液放入攪拌機打至滑身(不用太久,否則吃不到粒粒蕃薯),然後加入已打起至70% soft peak的忌廉。

5. 將布甸材料分別倒入4個小容器內,放涼放入雪櫃雪3小時以上至凝固。

6. 將切成薄片的蕃薯跟2茶匙糖及100ml水用小火同煮約15分鐘,直至變軟熟透。放涼,當布甸凝固後放上表面裝飾即成。

祝你有甜蜜的一天!


Sweet Potato Pudding (Serves 4) 

Ingredients:
5g Gelatin 
3 tbsp Hot Water 
100g Japanese Sweet Potato (peeled & diced)
300ml Milk 
90ml Cream 
50g Sugar 
20g Cream that whipped to soft peak 
4-8 pcs Japanese Sweet Potato Slices for garnish (unpeeled)
2 tsp Sugar 
100ml Water 

1. Melt gelatin in the hot water and stir well, set aside

2. In a small pot, put the diced sweet potato, milk, cream and sugar in it. Cook over low heat until sweet potatoes softened, about 20 minutes. 

3. Add the gelatin mixture in step 1 to the milk mixture, stir well and mix thoroughly. Turn off heat. 

4. Pour the sweet potato milk mixture in a blender and blend till smooth. (It's not necessary to blend for too long, or you cannot taste the tiny bits of sweet potatoes) Add the cream that has been whipped to soft peak.

5. Fill 4 ramekins with the liquid and place in the fridge until set and chilled.  About 3 hours.

6. Cook the sweet potato slices with 2 tsp sugar and 100ml water, simmer under low heat for 15 minutes or until cooked and softened, let cool. Garnish on top of pudding when the pudding is set.

Have a sweet day!


Friday, May 15, 2015

COOK - 南瓜忌廉湯 Cream of Pumpkin Soup

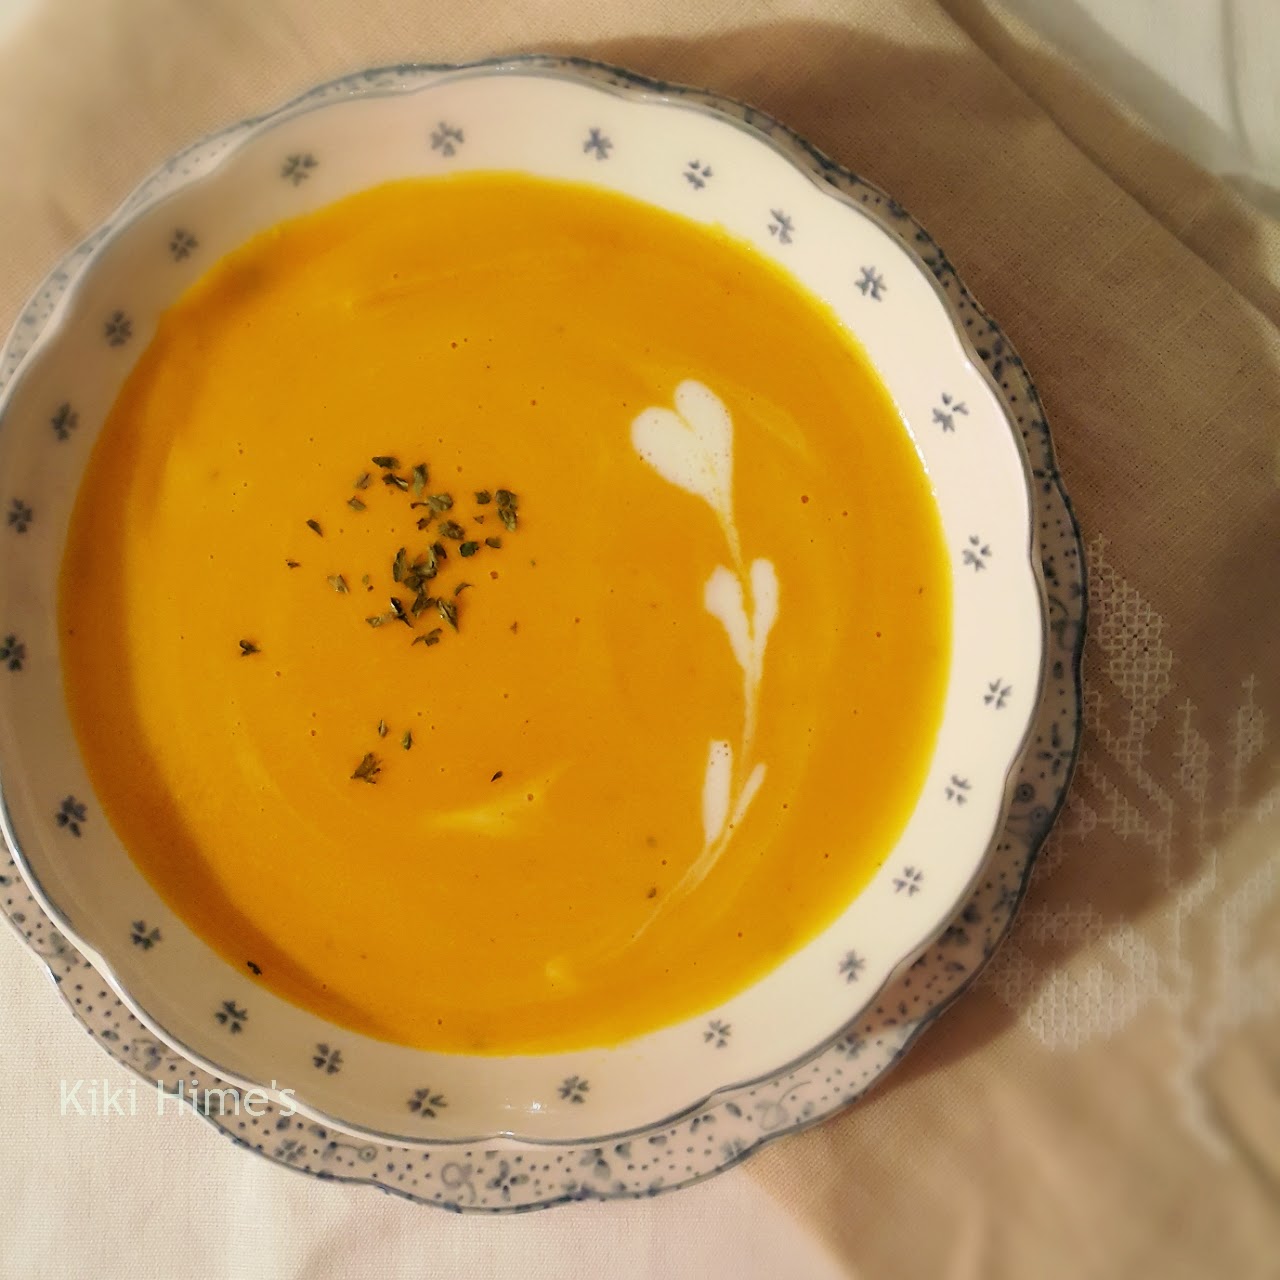
南瓜嚟講並唔係我鍾意嘅食物,不過唔可以唔鍾意就唔食,間中食下先均衡營養。買咗半個日本南瓜返嚟,切片放入Airfryer roast 5分鐘,再加少少海鹽,又幾好味喎。可能我之前對佢有誤會喇。。。

剩底嘅南瓜又唔想淨係食一味roast咁悶,於是就決定將佢整成南瓜忌廉湯喇。仲加入秘密材料,飲完成個人有種好comforting嘅感覺。
秘密材料係乜?有人估係黃薑粉,有人估係咖喱粉,其實係。。。薑茸!加少少落去同南瓜係有synergy,有一種harmony喺入面,但飲湯嘅時候又唔會飲到有薑味,好舒服㗎!


南瓜忌廉湯 (2人份)

洋蔥 1/2個 (切小粒)
南瓜 去皮後~300g (切小粒)
海鹽 1/2茶匙
忌廉 250ml
牛奶 600ml
雞湯 150ml
薑茸 2茶匙
百里香 1條
迷迭香 1/2條
乾義大利芫荽 少許(裝飾用)

1. 湯鍋內加入少許橄欖油,將洋蔥粒炒香,放入南瓜粒和鹽同炒2分鐘。
2. 加入忌廉和牛奶入鍋內煮滾。放入百里香和迷迭香葉用中小火煮約15分鐘。
3. 當南瓜煮至變軟便把湯放入攪拌機內打至變滑。倒回湯鍋內,加入薑茸和雞湯拌勻煮滾。
4. 最後加入鹽調味,放入湯碗內再灑上乾義大利芫荽裝飾。


Cream of Pumpkin Soup (Serves 2)

1/2 Onion (minced)
300g Pumpkin after peeled (finely diced)
1/2 tsp Sea Salt
250ml Cream
600ml Milk
150ml Chicken Stock
2 tsp Grated Ginger
1 stalk Thyme
1/2 stalk Rosemary
Dried Italian Parsley for garnish

1. Add a little olive oil in a stock pot, fry the onion until golden, add diced pumpkin and salt and stir fry for 2 minutes. 
2. Add cream and milk and let boil. Then add the leaves of thyme and needles of the rosemary and simmer for 15 minutes. 
3. Once the pumpkins are cooked and soft, blend the soup in a blender until smooth. Put back in the stock pot, add ginger and chicken stock, stir well and let boil.
4. Adjust seasoning with salt, serve on a soup plate/bowl, garnish with dried parsley.